RBAC
Configure role based access control for your VDC resources.
Introduction
A critical part of any data centre - whether on-premises or in the cloud - is managing identity. In this section of the lab, we will look at two of the primary mechanisms for managing identity in the virtual data centre: Azure Active Directory (AAD) and Role Based Access Control (RBAC). We will use Azure AD to create users and groups and then use RBAC to assign roles and access to resources for these groups.
In this lab, we will create three groups of users, as shown in figure 25:
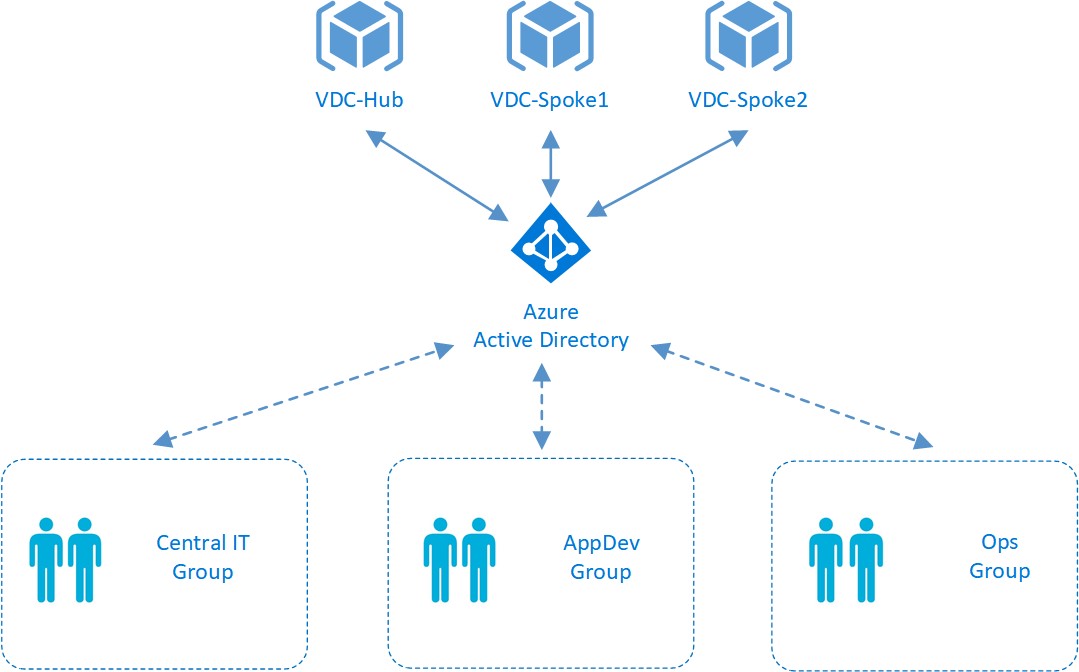
Figure 25: VDC Lab Users and Groups
The groups will have the following rights:
-
The Central IT group has overall responsibility for network and security components, therefore should have full control of the hub resources, with network contributor access on the spokes.
-
The AppDev group has responsibility for compute resources in the spoke resource groups, therefore should have the contributor role for virtual machines. Users in the AppDev group would also like to view (but not configure) resources in the Hub.
-
The Ops group are responsible for managing workloads in production, therefore will need full contributor rights in the spoke resource groups.
We’ll start by configuring a number of users and groups.
Configure Users and Groups
1) To begin, we’ll verify our domain name in the Azure portal. On the left hand side of the portal screen, click ‘All Services’ and then search for ‘Azure Active Directory’. Click on ‘Domain Name’ and you will see the domain assigned to your Azure AD directory.
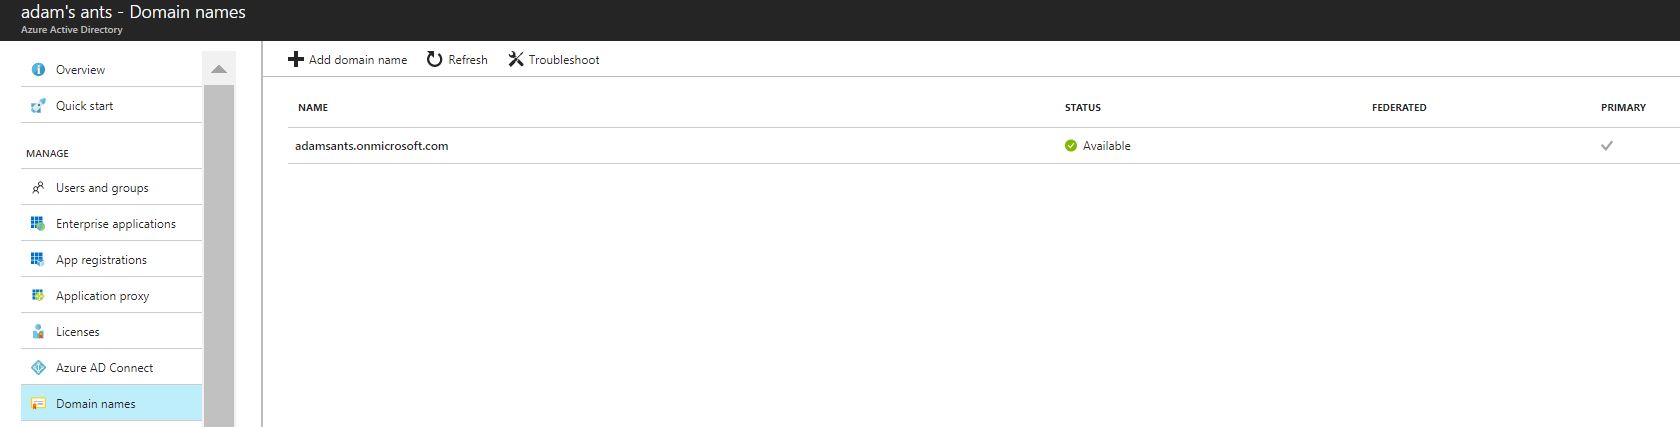
Figure 26: Azure AD Domain Name
2) Create three users (Fred, Bob and Dave) using the Azure CLI. Note that you will need to substitute your own domain in the user principal name.
az ad user create --display-name Fred --user-principal-name Fred@*domain*.onmicrosoft.com --password M1crosoft123
az ad user create --display-name Bob --user-principal-name Bob@*domain*.onmicrosoft.com --password M1crosoft123
az ad user create --display-name Dave --user-principal-name Dave@*domain*.onmicrosoft.com --password M1crosoft123
3) Create three groups (CentralIT, AppDev and Ops) using the Azure CLI:
az ad group create --display-name CentralIT --mail-nickname CentralIT
az ad group create --display-name AppDev --mail-nickname AppDev
az ad group create --display-name Ops --mail-nickname Ops
4) In order to add users to groups using the CLI, you will need the object ID of each user. To get these IDs, use the following command - make a note of the object IDs associated with each user:
az ad user list
The following is an example output from the previous command (do not use these object IDs - use your own!!):
[
  {
    "displayName": "Bob",
    "mail": null,
    "mailNickname": "Bob",
    "objectId": "d0463199-07c8-4768-abb0-3012b1ef856f",
    "objectType": "User",
    "signInName": null,
    "userPrincipalName": "Bob@*domain*.onmicrosoft.com"
  },
  {
    "displayName": "Dave",
    "mail": null,
    "mailNickname": "Dave",
    "objectId": "69f6f292-2c2f-4451-8054-ff6addb300a4",
    "objectType": "User",
    "signInName": null,
    "userPrincipalName": "Dave@*domain*.onmicrosoft.com"
  },

  {
    "displayName": "Fred",
    "mail": null,
    "mailNickname": "Fred",
    "objectId": "4c53a57e-2a2d-4a1d-8af6-e811850a869e",
    "objectType": "User",
    "signInName": null,
    "userPrincipalName": "Fred@*domain*.onmicrosoft.com"
  }
]
5) Use the object IDs to add the users to each group as follows:
- Fred: CentralIT
- Bob: AppDev
- Dave: Ops
The Azure CLI can be used to do this, as follows:
az ad group member add --member-id *Fred's OID* --group CentralIT
az ad group member add --member-id *Bob's OID* --group AppDev
az ad group member add --member-id *Dave's OID* --group Ops
Assign Users and Roles to Resource Groups
Now that we have our users and groups in place, it’s time to make use of them by assigning the groups to resource groups. We will also assign roles to determine what access a group has on a given resource group.
1) In the Azure portal, navigate to the ‘VDC-Hub’ resource group and then the ‘IAM’ section.
2) You will see the user you are currently logged on as (i.e. the admin). Click ‘Add’ at the top of the screen and then select the ‘Contributor’ role from the drop down box. Select the ‘CentralIT’ user from the list of users and groups. Click ‘save’.
3) Click ‘Add’ again, but this time select the ‘Reader’ role and then choose the ‘AppDev’ group.
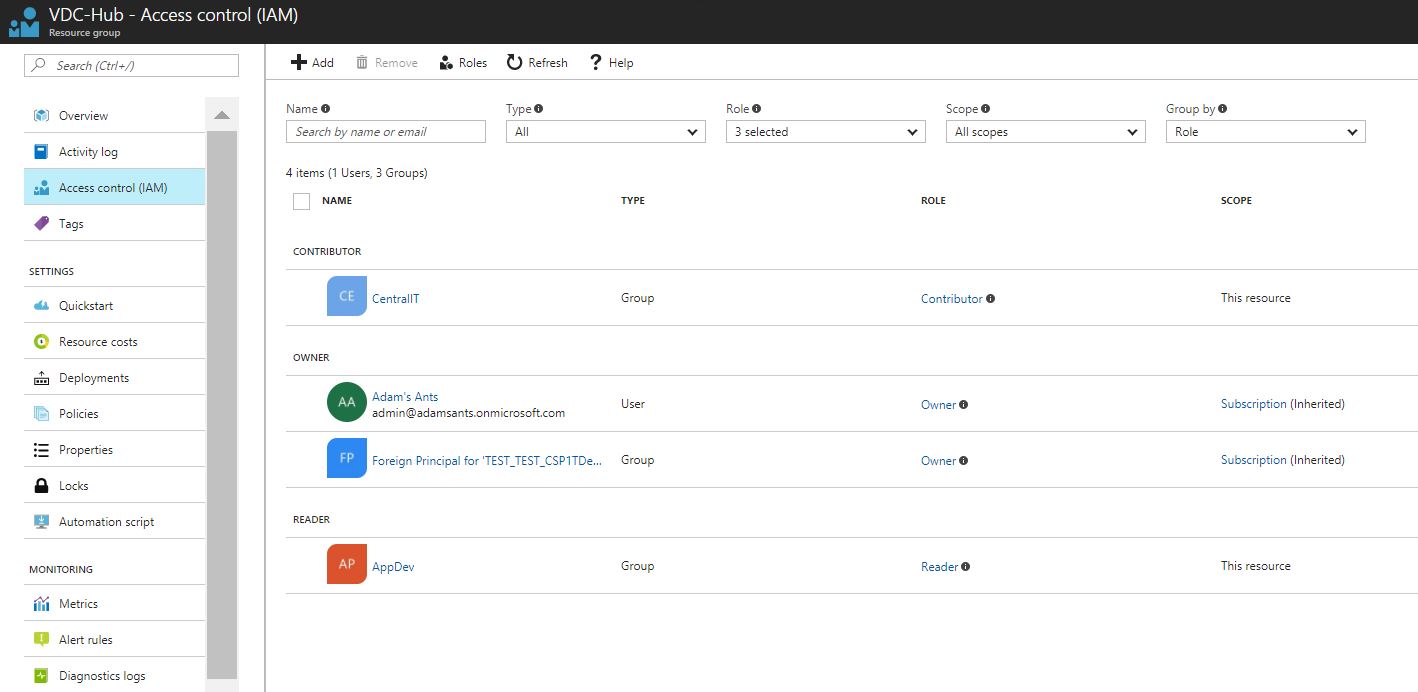
Figure 27: Hub Role Based Access Control
4) Navigate to the ‘VDC-Spoke1’ resource group and select ‘IAM’. Click ‘Add’ and then select the ‘Virtual Machine Contributor’ role. Add the AppDev group. Repeat this step for the ‘VDC-Spoke2’ resource group.
5) For Spokes 1 and 2, add CentralIT with the ‘Network Contributor’ role.
6) For Spokes 1 and 2, add the ‘Ops’ group with the ‘Contributor’ role.
Test User and Group Access
Now that we have Azure AD groups assigned to resource groups with the appropriate roles, we can test the access that each user has.
1) Open a private browsing window / incognito window (depending on browser) and browse to the Azure portal (portal.azure.com).
2) Log on to the portal as Dave (dave@domain.onmicrosoft.com) using the password M1crosoft123.
3) Navigate to the resource groups view. As Dave is part of the Ops group, you will see that he has full visibility of the Spoke 1 and 2 resource groups, however Dave has no visibility of any other resource group, including the Hub.
4) Log off from the portal and then log on again, this time as Bob (bob@domain.onmicrosoft.com).
5) Navigate to the resource groups view. As Bob is part of the AppDev group, he has full visibility of the two Spoke resource groups, but only has read access to the VDC-Hub group. Select the VDC-Hub group and then ‘Hub_VNet’. Notice that Bob cannot make any changes to the Hub_VNet resource, or any resource within the group.
6) Log off from the portal and then log on again, this time as Fred (fred@domain.onmicrosoft.com).
7) Navigate to the ‘VDC-Spoke1’ resource group. Select ‘Hub_VNet’. Note that Fred is able to make changes / adds, etc to the Hub_VNet network resource (remember that Fred is part of the CentralIT group, which has the network contributor role on Spoke 1 and 2 resource groups). However, Fred is not able to see any of the virtual machine resources as the CentralIT group does not have the virtual machine contributor role on this resource group.
Conclusion
Well done, you made it to the end of the lab! We’ve covered a lot of ground in this lab, including networking, security, monitoring and identity - I hope you enjoyed running through the lab and that you learnt a few useful things from it. Don’t forget to delete your resources after you have finished!
Decommission the Lab
To decommission the VDC lab, simply remove the resource groups using the following commands:
for rg in Hub Spoke1 Spoke2 OnPrem NVA
do az group delete --yes --no-wait --name VDC-$rg
done
Useful References
-
Azure Virtual Data Center White Paper: https://azure.microsoft.com/mediahandler/files/resourcefiles/1ad643b8-73f7-43f6-b05a-8e160168f9df/Azure_Virtual_Datacenter.pdf
-
Secure Network Designs: https://docs.microsoft.com/azure/best-practices-network-security?toc=%2fazure%2fnetworking%2ftoc.json
-
Hub and Spoke Network Topologies: https://docs.microsoft.com/azure/architecture/reference-architectures/hybrid-networking/hub-spoke
-
Azure Role Based Access Control: https://docs.microsoft.com/azure/active-directory/role-based-access-control-what-is
-
Azure Network Watcher: https://docs.microsoft.com/azure/network-watcher/network-watcher-monitoring-overview
-
Azure Monitor: ,https://docs.microsoft.com/azure/monitoring-and-diagnostics/monitoring-overview-azure-monitor