Policy Aliases
Policy aliases are the secret sauce in custom policy creation. This lab will explain what they are and help you list the ones available for a resource type.
Discovering aliases
In this lab section you will use the vscode extension to create a policy to meet the customer requirement in the scenario above. The lab will highlight the functionality of the extension, as well as understanding how aliases work.
We’ll be initally working in Bash before moving to vscode, but feel free to use similar PowerShell commands or the portal as long as you get to the same point.
Create an NSG
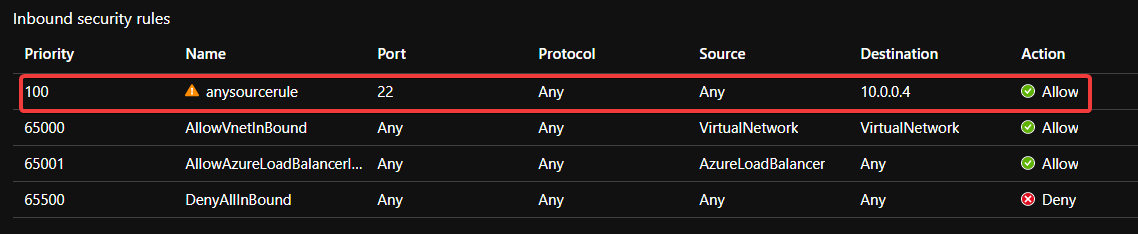
Start by creating an NSG containing an offending rule.
Log into Azure and select the correct subscription before starting.
-
Create a resource group
az group create --name custom_policy_lab --location uksouth -
Create a network security group
az network nsg create --name offender --resource-group custom_policy_lab --location uksouth -
Add a rule similar to the any source JIT rule
az network nsg rule create --name anysourcerule \
  --nsg-name offender \
  --resource-group custom_policy_lab \
  --direction Inbound \
  --priority 100 \
  --destination-address-prefix 10.0.0.4 \
  --destination-port 22
You will now have an NSG with an offending rule that matches those created by JIT.
Find aliases with the Policy extension
Before creating a custom policy it is important to understand which aliases to use. These will be used as fields in the policyRule. We then need to determine the logic we want to create.
The Azure Policy extension in vscode helps to view resources and policies and to discover the right aliases to use in your policy rules, but also be aware that it is a preview extension and does not always include the full set of available aliases.
-
Create a working folder for the lab
mkdir ~/custom_policy_lab -
Open the folder in vscode
code ~/custom_policy_lab -
Open the extension side bar (‘CTRL’+‘SHIFT’+‘E’)
-
Click on Azure Policy
- Install the extension if you haven’t done so already
- Log in to Azure if the toast notification prompts you
- It takes a couple of minutes to discover your resources and policy information
-
Browse the policy section to view the policies, initiatives and assignments
-
Browse the Resource Groups and click on your NSG
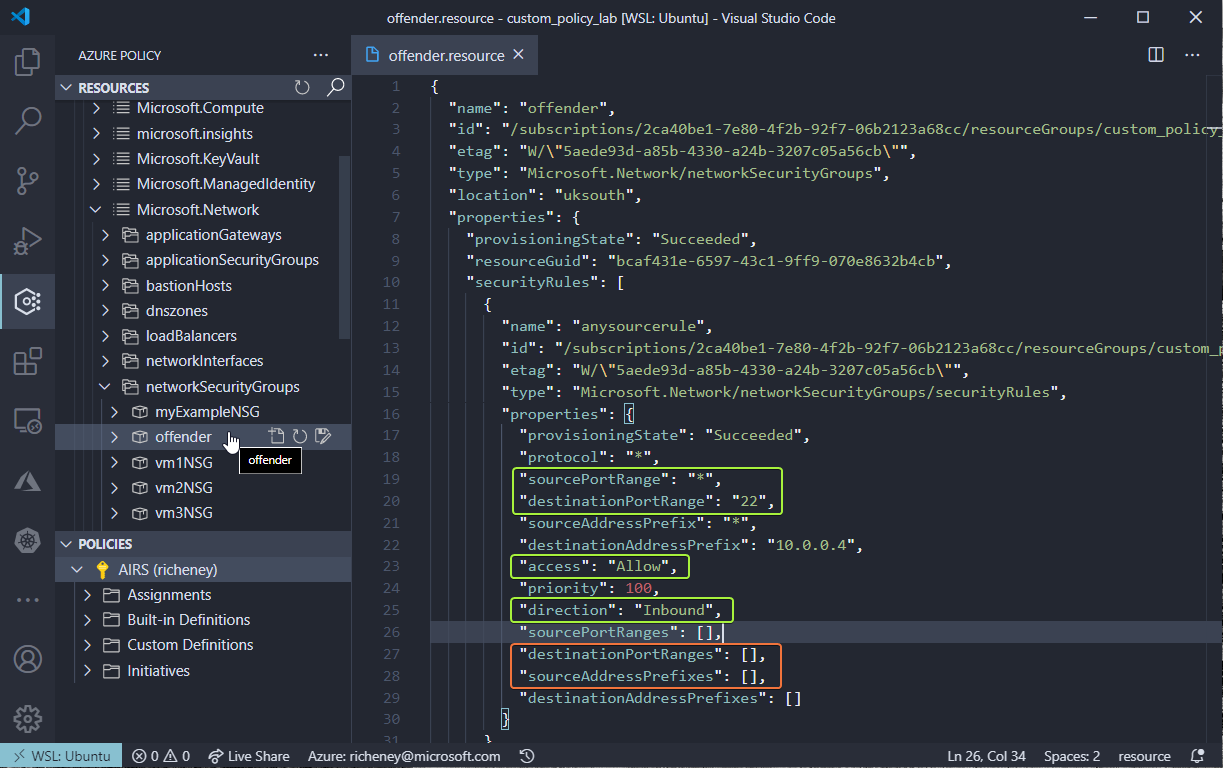
The resource type is Microsoft.Network/networkSecurityGroups.
The destinationPortRange and sourceAddressPrefix are the two properties that were populated. We should also check the rule to ensure that the direction is Inbound and access is Allow.
NSG rules also allow you to specify either source address prefixes and destination port ranges as arrays, so should we also check the destinationPortRanges and sourceAddressPrefixes as well to make sure nothing slips through the net?
-
Browse the Resource Providers and drill into Microsoft.Network and then networkSecurityGroups
- If you click on the offender NSG then you’ll see the same resource info as before
-
Hover over the destinationPortRange and copy the alias
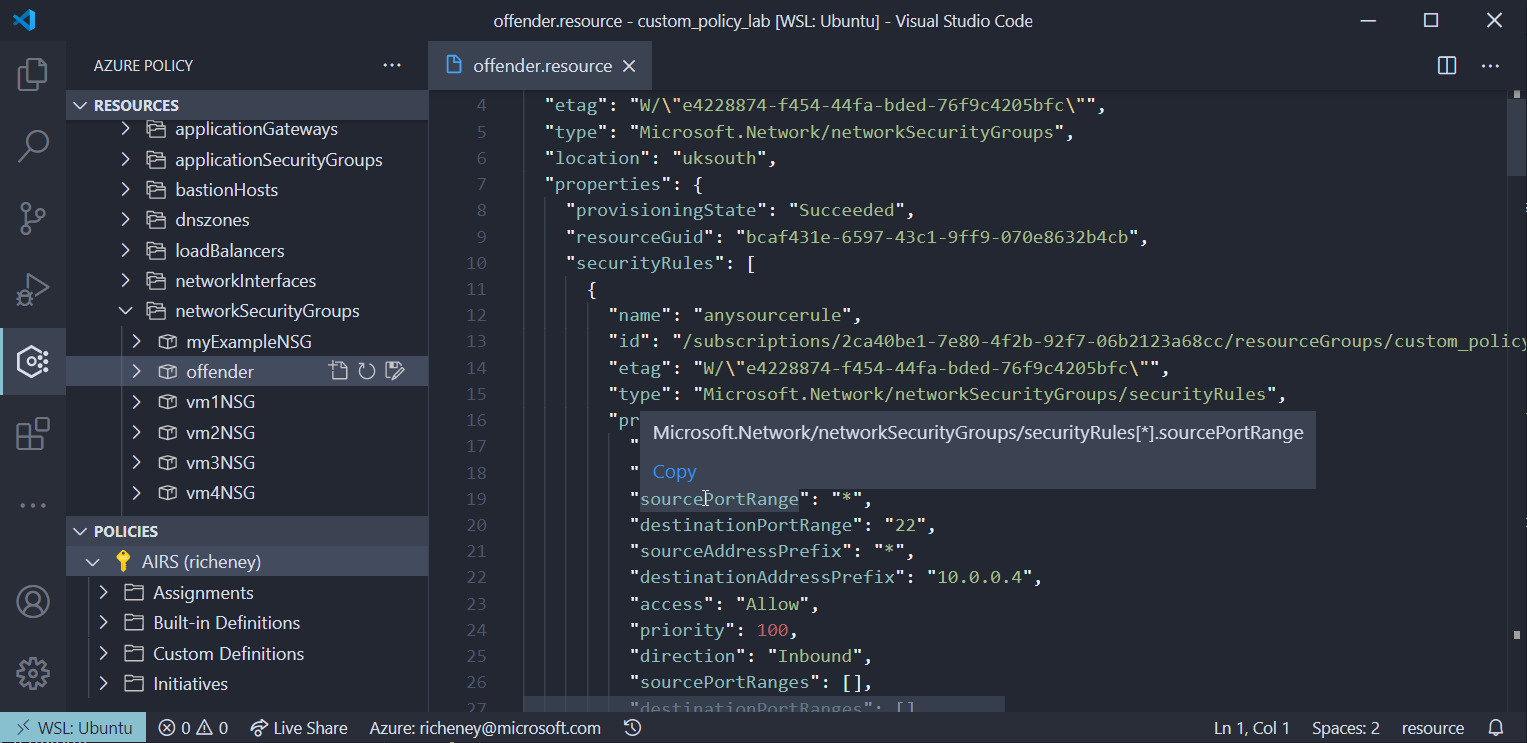
- Create a new file called aliases
- Paste in the alias
- Repeat the process for sourceAddressPrefix
Your list of aliases from the resource level should be:
Microsoft.Network/networkSecurityGroups/securityRules[*].destinationPortRange Microsoft.Network/networkSecurityGroups/securityRules[*].sourceAddressPrefix -
Hover over the destinationPortRanges and sourceAddressPrefixes arrays
Note that the vscode extension does not display aliases for these.
As already mentioned, the extension is in preview and has not yet been updated to include all aliases.
We will use the CLI soon to pull out all of the available aliases and to understand how they differ.
-
Explore the sub-resource
- Open the tree for the Resource Providers and you will see securityRules as a sub resource type
- Click on anysourcerule
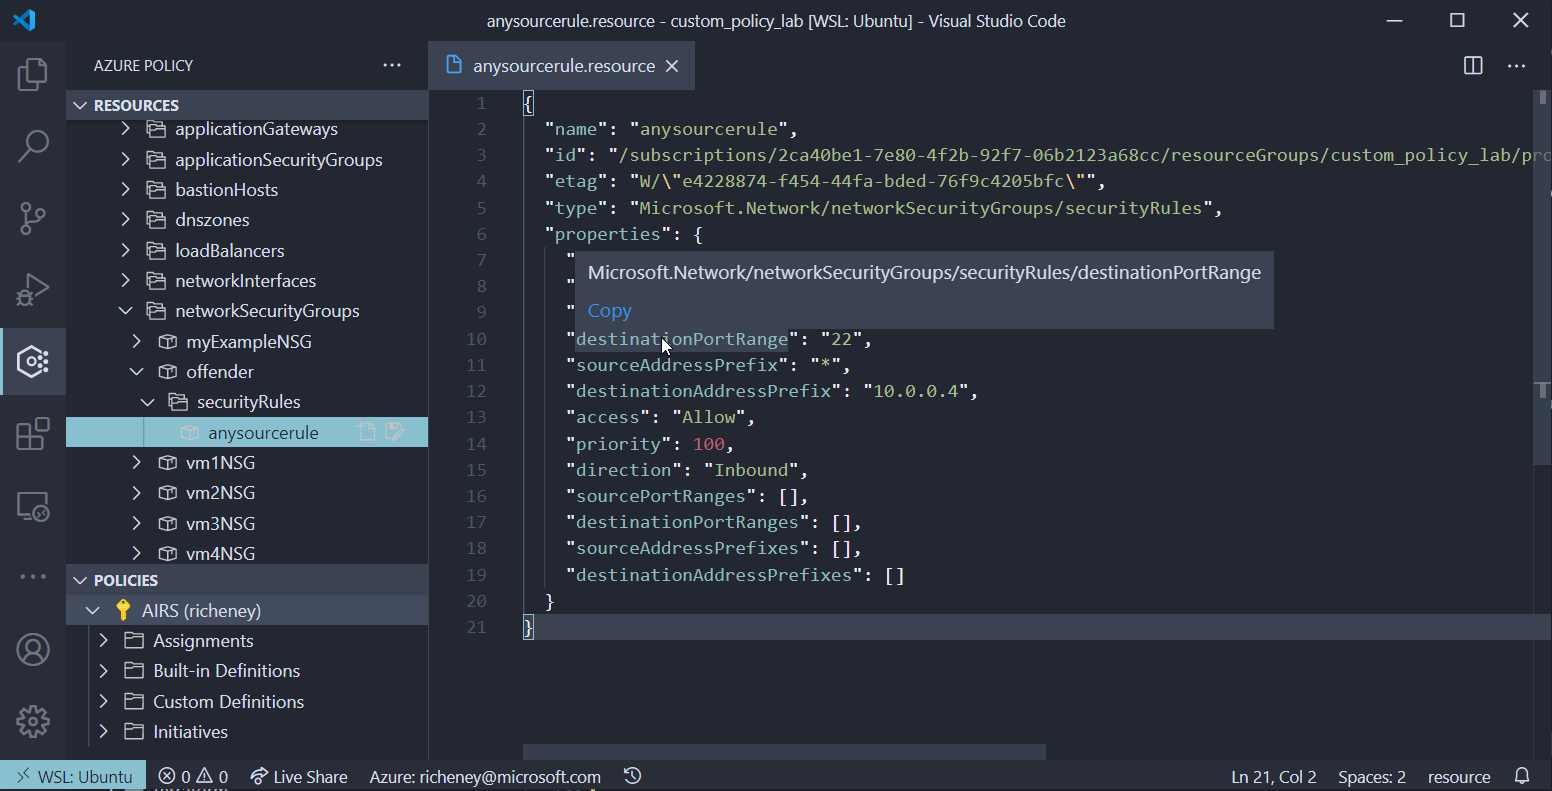
OK, now we have more aliases that we could use if we are working at the sub resource level.
Microsoft.Network/networkSecurityGroups/securityRules.destinationPortRange
Microsoft.Network/networkSecurityGroups/securityRules.sourceAddressPrefix
Many of the more complex resources have sub-resources and the resource provider tree is a great way of finding those.
Find aliases with the Azure CLI
We’ll use the Azure CLI to get a definitive list of the aliases as the vscode extension isn’t showing everything. Some of these commands won’t be pretty as they are using some complex JMESPATH queries to dig out the information.
Alternatively you can use the Resource Graph, PowerShell or REST API to query for aliases.
-
List the resourceTypes
We already know that we can look at the resource or sub-resource level. Let’s show those:
az provider show --namespace Microsoft.Network --expand "resourceTypes/aliases" --query "resourceTypes[?starts_with(resourceType, 'networkSecurityGroups')].resourceType" --output yamlExpected output:
- networkSecurityGroups - networkSecurityGroups/securityRules -
List the aliases
List all of the aliases for the Microsoft.Network provider.
az provider show --namespace Microsoft.Network --expand "resourceTypes/aliases" --query "resourceTypes[].aliases[].name" --output tsvThere will be over 17,000 aliases for the Microsoft.Network provider. Time to filter.
-
Filter on Microsoft.Network/networkSecurityGroups
Add an additional section to the JMESPATH query to filter on the resource provider type.
az provider show --namespace Microsoft.Network --expand "resourceTypes/aliases" --query "resourceTypes[?resourceType == 'networkSecurityGroups'].aliases[].name" --output tsvNow we have just over 780 aliases.
-
Filter aliases on name
OK, let’s list out the possible sourceAddress aliases to test where the source address could be set to Any. We’ll create some custom JSON en route.
az provider show --namespace Microsoft.Network --expand "resourceTypes/aliases" --query "resourceTypes[?starts_with(resourceType, 'networkSecurityGroups')].{type: resourceType, alias:aliases[?contains(name, 'sourceAddress')].name}" --output yamlcExample output:
- alias:
  - Microsoft.Network/networkSecurityGroups/securityRules[*].sourceAddressPrefix
  - Microsoft.Network/networkSecurityGroups/securityRules[*].sourceAddressPrefixes[*]
  - Microsoft.Network/networkSecurityGroups/securityRules[*].sourceAddressPrefixes
  type: networkSecurityGroups
- alias:
  - Microsoft.Network/networkSecurityGroups/securityRules/sourceAddressPrefix
  - Microsoft.Network/networkSecurityGroups/securityRules/sourceAddressPrefixes[*]
  - Microsoft.Network/networkSecurityGroups/securityRules/sourceAddressPrefixes
  type: networkSecurityGroups/securityRules
(I’ve removed the defaultSecurityRules as we’re ignoring those.)
The set of aliases for destinationPortRange matches the list format above.
OK, so we know which aliases we can work with. In the next section we’ll determine the logic and see the constructs in the policy structure that we can use.