Virtual Network
Create a Virtual Network with two subnets, and add a VM to each.
Lab Overview
In this lab, we will learn how to get started with on Azure to deploy your IaaS resources. We will create a virtual network (vNet) in Azure. We will then add two subnets in the lab and add two virtual machines, one in each subnet.
It is expected you have access to Azure portal and have an account and subscription created on Azure.
Lab Diagram
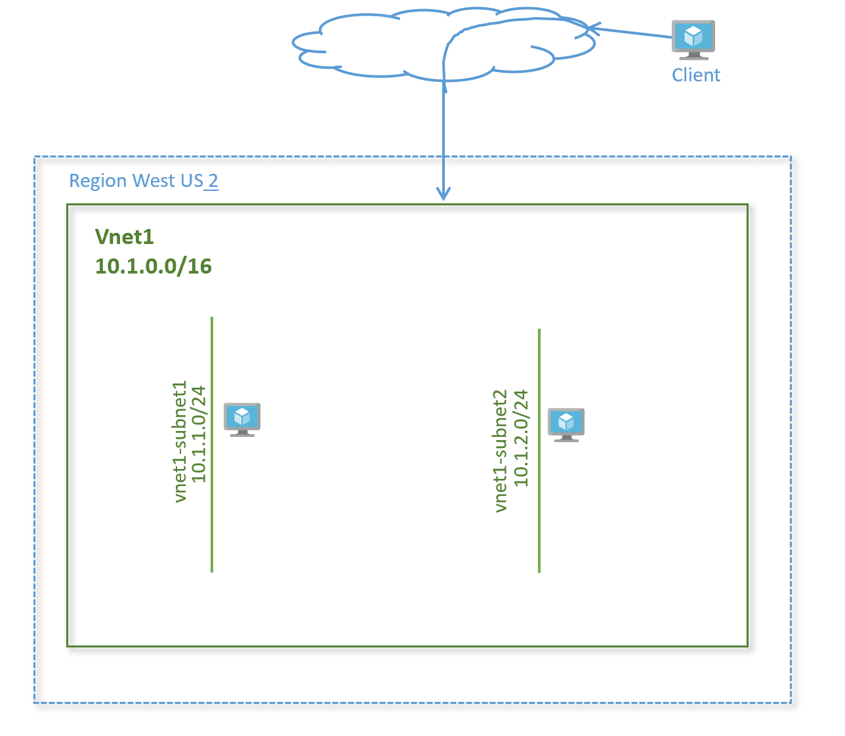
Create a virtual network
-
To access the Azure portal, go to http://portal.azure.com
-
Click on Create a resource > Networking > Virtual Network
-
In Create virtual network, enter or select this information:
Setting Value Subscription Select your subscription Resource group Select Create new, enter rg-lab, then select OK Name Enter vnet1 Region Select (US) West US 2 -
Click Next: IP Addresses
Setting Value IPv4 address space Enter 10.1.0.0/16 -
Click +Add subnet
Setting Value Subnet-name Enter vnet1-subnet1 Subnet - Address range Enter 10.1.1.0/24 -
Click Add
-
Repeat steps 4 and 5 to add one more subnet as below:
Setting Value Subnet-name Enter vnet1-subnet2 Subnet - Address range Enter 10.1.2.0/24 -
Leave the rest as default and select Review + Create. Review the values. Your output should look like this:
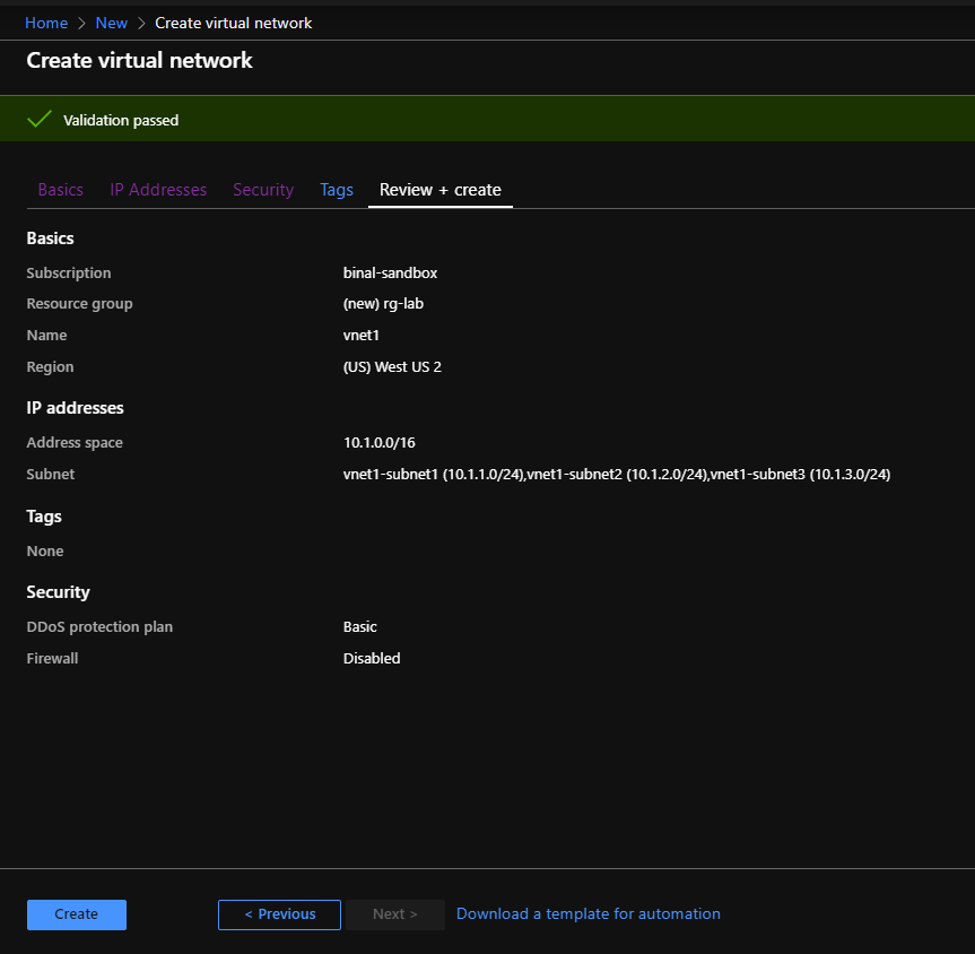
-
Click Create
-
Once the deployment is complete, go to the search bar at the top and type ‘Virtual Networks’ (
G+/). Select Virtual Networks in the search results. You should see vnet1 show up in the list.
Create virtual machines
Create a virtual machine in the virtual network.
Create the first VM
-
On the upper-left side of the screen, select Create a resource > Compute > Virtual Machine
-
In Create a virtual machine - Basics, enter or select this information:
PROJECT DETAILS
Setting Value Subscription Select your subscription. Resource group Select rg-lab. You created this in the previous section. INSTANCE DETAILS
Setting Value Virtual machine name Enter vnet1-vm-mgmt1 Region Select West US 2 Availability options Leave the default No infrastructure redundancy required Image Leave the default Ubuntu Server 18.04 LTS Size Leave the default Standard DS2 v3 ADMINISTRATOR ACCOUNT
Setting Value Username Enter a user name of your choosing Password Enter a password of your choosing. The password must be at least 12 characters long and meet the defined complexity requirements. Confirm Password Reenter password INBOUND PORT RULES
Setting Value Public inbound ports None -
Select Next : Disks
-
In Create a virtual machine - Disks, leave the defaults and select Next : Networking
-
In Create a virtual machine - network-conceptsing, select this information:
Setting Value Virtual network Leave the default vnet1 Subnet Leave the default vnet1-subnet1 (10.1.1.0/24) Public IP Leave the default (new) vnet1-vm-mgmt1-ip Public inbound ports Select Allow selected ports Select inbound ports Select HTTP and SSH -
Select Review + create. You’re taken to the Review + create page where Azure validates your configuration.
-
When you see the Validation passed message, select Create.
-
Once the deployment is complete, click Go to resource. This will take you to the VM overview page. Verify the VM status shows as Running.
Create a second virtual machine
Repeat the above steps to spin up a second virtual machine with the following configuration:
| Setting | Value |
|---|---|
| Instance name | vnet1-vm-web1 |
| Subnet | vnet1 |
| Subnet | vnet1-subnet2 |
| Public Inbound ports | SSH, HTTP |
Keep the rest of the parameters default and create the virtual machine.
Install web server on virtual machine vnet1-vm-web1
Connect to the virtual machine.
-
Search virtual machines in the Search bar in the portal
-
Select the virtual machine vnet1-vm-web1
-
Go to the Overview page
-
Copy the public IP address of the VM
-
From your laptop terminal, run command:
ssh <username>@<Public_IP_of_the_VM> -
Install apache2 on the server
sudo apt-get -y update sudo apt-get -y install apache2 -
Verify the service is running on the server. You should see a status of active (running) in the output:
sudo service apache2 status -
When done, type
exitto leave the SSH session.
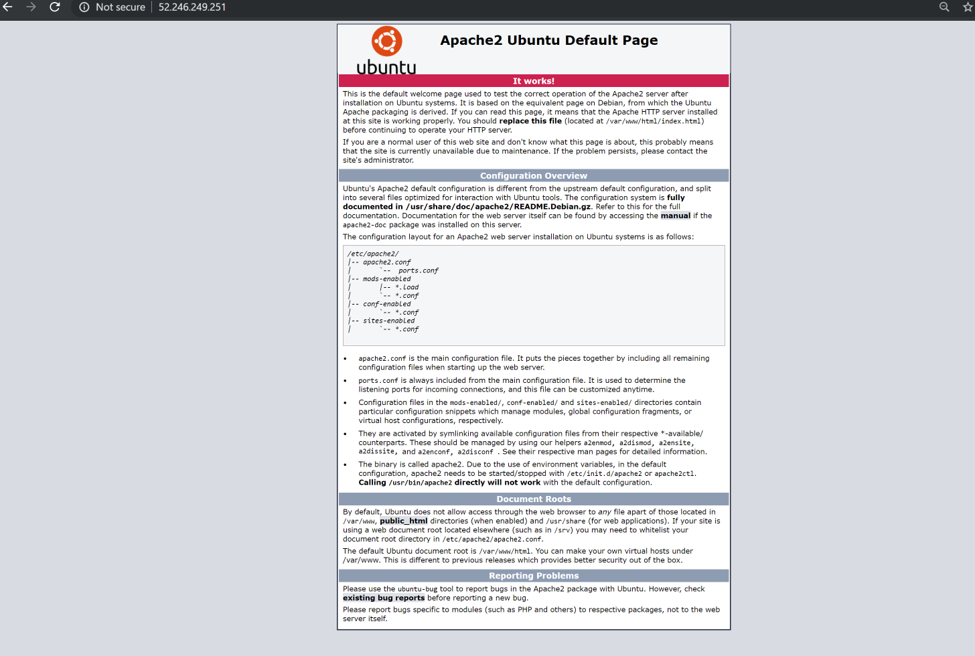
View the web server in action
Use a web browser of your choice to view the default welcome page. Type the public IP address of the VM as the web address. The public IP address can be found on the VM overview page or as part of the SSH connection string you used earlier.
Verify the web page loads successfully.
Next
In the next lab we will create Network Security Groups to control traffic via layer 4 ACLs.