Azure Citadel
  • Blogs

  • ARM
  • Azure Arc
    • Overview
    • Azure Arc-enabled Servers
      • Prereqs
      • Scenario
      • Hack Overview
      • Azure Landing Zone
      • Arc Pilot resource group
      • Azure Monitoring Agent
      • Additional policy assignments
      • Access your on prem VMs
      • Create onboarding scripts
      • Onboarding using scripts
      • Inventory
      • Monitoring
      • SSH
      • Windows Admin Center
      • Governance
      • Custom Script Extension
      • Key Vault Extension
      • Managed Identity
    • Azure Arc-enabled Kubernetes
      • Prereqs
      • Background
      • Deploy Cluster
      • Connect to Arc
      • Enable GitOps
      • Deploy Application
      • Enable Azure AD
      • Enforce Policy
      • Enable Monitoring
      • Enable Azure Defender
      • Enable Data Services
      • Enable Application Delivery
    • Useful Links
  • Azure CLI
    • Install
    • Get started
    • JMESPATH queries
    • Integrate with Bash
  • Azure Landing Zones
    • Prereqs
    • Day 1
      • Azure Baristas
      • Day 1 Challenge
    • Day 2
      • Example
      • Day 2 Challenge
    • Day 3
      • Day 3 Challenge
    • Useful Links
  • Azure Policy
    • Azure Policy Basics
      • Policy Basics in the Azure Portal
      • Creating Policy via the CLI
      • Deploy If Not Exists
      • Management Groups and Initiatives
    • Creating Custom Policies
      • Customer scenario
      • Policy Aliases
      • Determine the logic
      • Create the custom policy
      • Define, assign and test
  • Azure Stack HCI
    • Overview
    • Useful Links
    • Updates from Microsoft Ignite 2022
  • Marketplace
    • Introduction
      • Terminology
      • Offer Types
    • Partner Center
    • Offer Type
    • Publish a VM Offer HOL
      • Getting Started
      • Create VM Image
      • Test VM Image
      • VM Offer with SIG
      • VM Offer with SAS
      • Publish Offer
    • Other VM Resources
    • Publish a Solution Template HOL
      • Getting Started
      • Create ARM Template
      • Validate ARM Template
      • Create UI Definition
      • Package Assets
      • Publish Offer
    • Publish a Managed App HOL
      • Getting Started
      • Create ARM Template
      • Validate ARM Template
      • Create UI Definition
      • Package Assets
      • Publish Offer
    • Managed Apps with AKS HOL
    • Other Managed App Resources
    • SaaS Offer HOLs
    • SaaS Offer Video Series
      • Video 1 - SaaS Offer Overview
      • Video 2 - Purchasing a SaaS Offer
      • Video 3 - Purchasing a Private SaaS Plan
      • Video 4 - Publishing a SaaS Offer
      • Video 5 - Publishing a Private SaaS Plan
      • Video 6 - SaaS Offer Technical Overview
      • Video 7 - Azure AD Application Registrations
      • Video 8 - Using the SaaS Offer REST Fulfillment API
      • Video 9 - The SaaS Client Library for .NET
      • Video 10 - Building a Simple SaaS Landing Page in .NET
      • Video 11 - Building a Simple SaaS Publisher Portal in .NET
      • Video 12 - SaaS Webhook Overview
      • Video 13 - Implementing a Simple SaaS Webhook in .NET
      • Video 14 - Securing a Simple SaaS Webhook in .NET
      • Video 15 - SaaS Metered Billing Overview
      • Video 16 - The SaaS Metered Billing API with REST
  • Microsoft Fabric
    • Theory
    • Prereqs
    • Fabric Capacity
    • Set up a Remote State
    • Create a repo from a GitHub template
    • Configure an app reg for development
    • Initial Terraform workflow
    • Expanding your config
    • Configure a workload identity
    • GitHub Actions for Microsoft Fabric
    • GitLab pipeline for Microsoft Fabric
  • Packer & Ansible
    • Packer
    • Ansible
    • Dynamic Inventories
    • Playbooks & Roles
    • Custom Roles
    • Shared Image Gallery
  • Partner
    • Lighthouse and Partner Admin Link
      • Microsoft Cloud Partner Program
      • Combining Lighthouse and PAL
      • Minimal Lighthouse definition
      • Using service principals
      • Privileged Identity Management
    • Useful Links
  • REST API
    • REST API theory
    • Using az rest
  • Setup
  • Terraform
    • Fundamentals
      • Initialise
      • Format
      • Validate
      • Plan
      • Apply
      • Adding resources
      • Locals and outputs
      • Managing state
      • Importing resources
      • Destroy
    • Working Environments for Terraform
      • Cloud Shell
      • macOS
      • Windows with PowerShell
      • Windows with Ubuntu in WSL2
    • Using AzAPI
      • Using the REST API
      • azapi_resource
      • Removing azapi_resource
      • azapi_update_resource
      • Data sources and outputs
      • Removing azapi_update_resource
  • Virtual Machines
    • Azure Bastion with native tools & AAD
    • Managed Identities

  • About
  • Archive
  1. Home
  2. Archive
  3. Network
  4. Core Concepts
  5. NVA CSR1000v

Table of Contents

  • Lab Overview
  • Deploy network virtual appliance CSR1000v in Azure
  • Connect
  • Verify

NVA CSR1000v

Deploy a Cisco network virtual appliance from the Azure Marketplace.

Lab Overview

Let’s look at how to deploy an NVA on Azure. We will deploy a Cisco CSR 1000v router from Azure Marketplace. Note that there are a wide range of network virtual appliances available from several vendors.

Deploy network virtual appliance CSR1000v in Azure

  1. Deploy a CSR1000v virtual router in Azure.

    1. From the portal home page, click on + Create a resource.
    2. Type “csr” in the search box.
    3. This should give you a drop down menu on options on how to deploy the CSR. Select option ‘CSR1000v Solution Deployment’ and click Create.
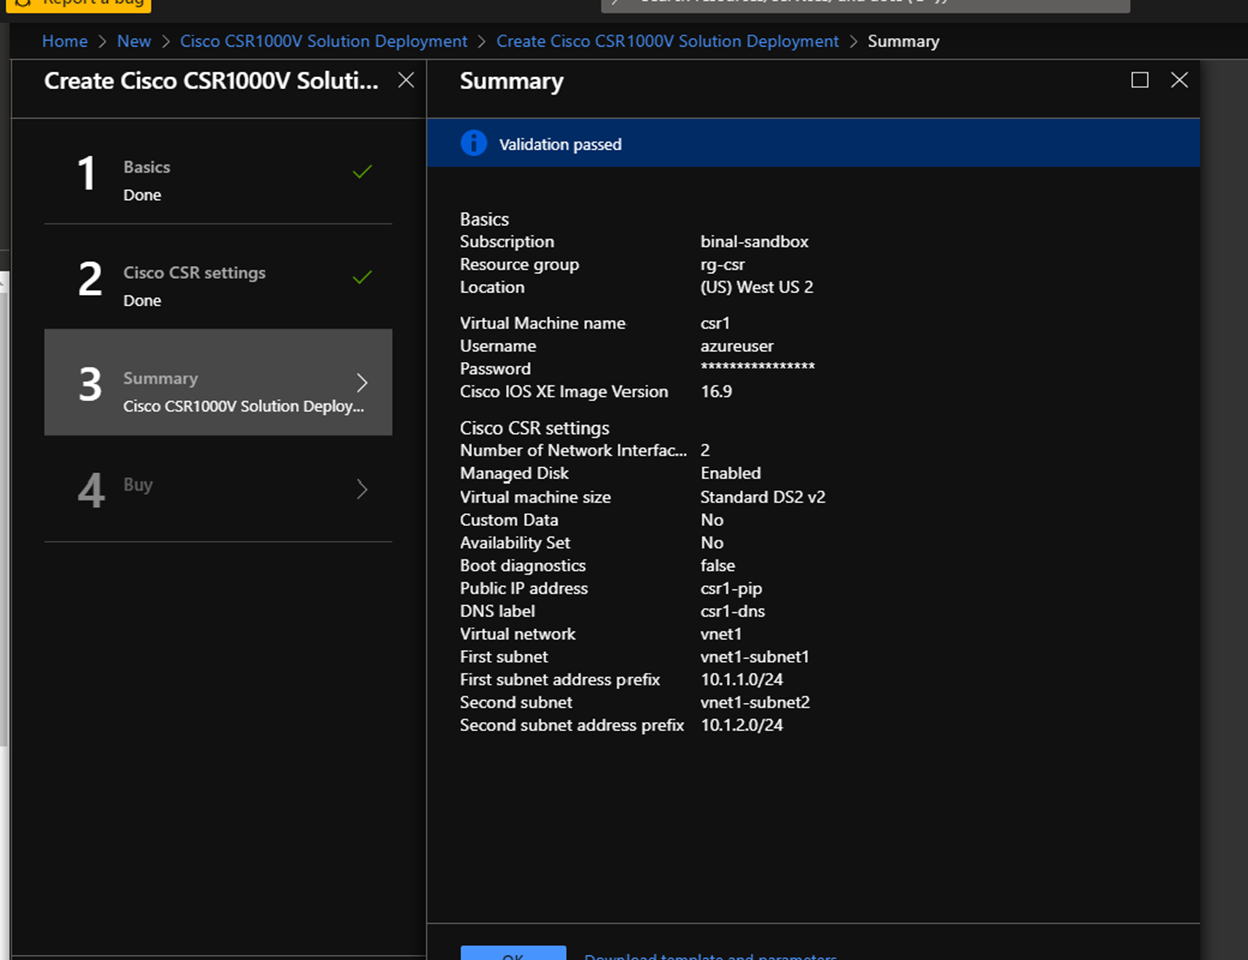
  2. This will bring up a configuration screen for CSR. Follow the steps to complete the configuration and create the CSR. Remember to add 2 network interfaces to CSR. Follow prompts to create a new virtual network. We will use this vnet as simulated on-premises environment.

    Setting Value
    Basics
    VM name csr1
    Username Azureuser
    Password <password of your choice>
    Resource Group Click Create new to create a new resource group rg-csr
    Location West US 2
    Cisco CSR settings
    Number of network interfaces in CSR 2
    Availability set For this lab, select No
    Virtual-network vnet1
    First subnet Name: vnet1-subnet1
    Address prefix: 10.1.1.0/24
    Second subnet Name: vnet1-subnet2
    Address prefix: 10.1.2.0/24
  3. Verify configuration and click OK to go to the page to buy the CSR. Add your name, email address, phone number and click Buy. Remember NVA charges will apply.

  4. Go to the Virtual machines page. You should see the VM ‘csr1’ listed.

  5. Once the status of the VM changes to ‘Running’, click on the name. This takes you to the VM overview page.

    Summary

Connect

  1. Once the virtual machine is created, go to the VM and get the public IP.

  2. From a terminal, connect to the VM as follows:

    ssh azureuser@<public-ip-of-csr-vm>
    

    This brings you to the CSR prompt where you can view and configure the CSR.

Verify

Verify that the network security group was applied to the CSR. When you created a CSR NVA virtual machine, a network security group was applied to the CSR interfaces.

  1. Go to Network Security Groups and find NSG csr1-SSH-SecurityGroup
  2. Under Settings, go to Network interfaces
  3. See the network security group applied on the two csr network interfaces
  4. Verify the Inbound Security rules under Settings
  5. Review the rules allowed
Transitive Behaviour NVA CSR1000v Routing Tables