azapi_update_resource
Add an azapi_update_resource block into your Terraform config to configure properties that are not yet supported in the azurerm provider.
Introduction
| Date | Description |
|---|---|
| 2021-04-29 | Azure Web PubSub in Public Preview |
| 2021-08-02 | Developers start testing the preview functionality |
| 2021-11-16 | Azure Web PubSub goes GA |
| 2021-12-06 | Developers ask to include Web PubSub in the Terraform config |
| 2022-01-28 | azurerm v2.94: new resource azurerm_web_pubsub |
| 2022-02-07 | Switch to native support for the resource |
| 2022-02-14 | Asked to add system assigned managed identity |
The developers have come back to you as they need to make use of managed identity for their application. They want a system assigned managed identity and they will need to know both the tenant id and the object id.
The only problem is that it is not yet supported in the the azurerm_web_pubsub resource type.
Not a problem. You can use the azapi provider’s azapi_update_resource in the meantime.
Let’s see how the azapi_update_resource is used.
Starting configuration
Your main.tf file should be similar to this:
terraform {
  required_providers {
    azurerm = {
      source  = "hashicorp/azurerm"
      version = "=2.94"
    }

    azapi = {
      source  = "azure/azapi"
      version = "=0.3.0"
    }
  }
}

provider "azurerm" {
  features {}
}

provider "azapi" {}

resource "azurerm_resource_group" "azapi_labs" {
  name     = "azapi_labs"
  location = "West Europe"
}

resource "azurerm_web_pubsub" "webpubsub" {
  name                = "azapi-labs-richeney"
  resource_group_name = azurerm_resource_group.azapi_labs.name
  location            = azurerm_resource_group.azapi_labs.location
  sku                 = "Free_F1"
  capacity            = 1
}
⚠️ You should have a different value for your azurerm_web_pubsub.webpubsub.name.
Sample REST API update
Go back to the Web Pub Sub REST API reference documentation.
There are two ways of updating a Web Pub Sub resource via the REST API. You can use either
- Create or Updatewith PUT method, or
- Update, with PATCH method
Update aligns with azapi_update_resource. Check out the reference specification and examples.
Here is an example REST API request and body to add a system assigned managed identity to the Web Pub Sub service:
Request
PUT https://management.azure.com/subscriptions/00000000-0000-0000-0000-000000000000/resourceGroups/azapi_labs/providers/Microsoft.SignalRService/webPubSub/azapi-labs-richeney?api-version=2021-10-01
Body
{
  "identity": {
    "type": "SystemAssigned"
  },
  "location": "westeurope"
}
az rest
Here is the matching Azure CLI command.
az rest --method patch \
  --uri "https://management.azure.com/subscriptions/00000000-0000-0000-0000-000000000000/resourceGroups/azapi_labs/providers/Microsoft.SignalRService/webPubSub/azapi-labs-richeney?api-version=2021-10-01" \
  --body '{"identity":{"type":"SystemAssigned"}}'
⚠️ Strictly speaking the issues on the azapi repo suggest that PATCH is not supported as a method, but it appears to merge the body JSON with the existing config so you can use a partial JSON that would not be supported by a PUT method.
azapi_update_resource
Let’s see how that example REST API patch transfers to an azapi_update_resource.
-
Open the azapi_update_resource documentation
Open the azapi_update_resource page.
Pay attention to the note, which is copied out below:
This resource is used to add or modify properties on an existing resource. When delete azapi_update_resource, no operation will be performed, and these properties will stay unchanged. If you want to restore the modified properties to some values, you must apply the restored properties before deleting.
-
Add the azapi_update_resource block to the main.tf
resource "azapi_update_resource" "webpubsub_identity" {
  type      = "Microsoft.SignalRService/WebPubSub@2021-10-01"
  name      = azurerm_web_pubsub.webpubsub.name
  parent_id = azurerm_resource_group.azapi_labs.id

  body = jsonencode({
    identity = {
      "type" : "SystemAssigned"
    }
  })
}
⚠️ Remember that your azapi_update_resource.webpubsub_identity.name should match the resource name for your Web Pub Sub resource. Don’t use
azapi-labs-richeney.Setting the name to the exported name of the main resource will automatically set up an implicit dependency between azapi_update_resource.webpubsub_identity and azurerm_web_pubsub.webpubsub.
You may also add an explicit dependency into the block if desired, e.g.:
depends_on = [ azurerm_web_pubsub.webpubsub ] -
Save main.tf
-
Plan
terraform planazurerm_resource_group.azapi_labs: Refreshing state... [id=/subscriptions/00000000-0000-0000-0000-000000000000/resourceGroups/azapi_labs] azurerm_web_pubsub.webpubsub: Refreshing state... [id=/subscriptions/00000000-0000-0000-0000-000000000000/resourceGroups/azapi_labs/providers/Microsoft.SignalRService/WebPubSub/azapi-labs-richeney] Terraform used the selected providers to generate the following execution plan. Resource actions are indicated with the following symbols: + create Terraform will perform the following actions: # azapi_update_resource.webpubsub_identity will be created + resource "azapi_update_resource" "webpubsub_identity" { + body = jsonencode( { + identity = { + type = "SystemAssigned" } } ) + id = (known after apply) + ignore_casing = false + ignore_missing_property = false + name = "azapi-labs-richeney" + output = (known after apply) + parent_id = "/subscriptions/00000000-0000-0000-0000-000000000000/resourceGroups/azapi_labs" + resource_id = (known after apply) + type = "Microsoft.SignalRService/WebPubSub@2021-10-01" } Plan: 1 to add, 0 to change, 0 to destroy. ───────────────────────────────────────────────────────────────────────────── Note: You didn't use the -out option to save this plan, so Terraform can't guarantee to take exactly these actions if you run "terraform apply" now. -
Apply
terraform apply --auto-approveTerraform uses the azapi provider to update the Web PubSub resource.
Check
-
Check the identity blade for the Web Pub Sub resource
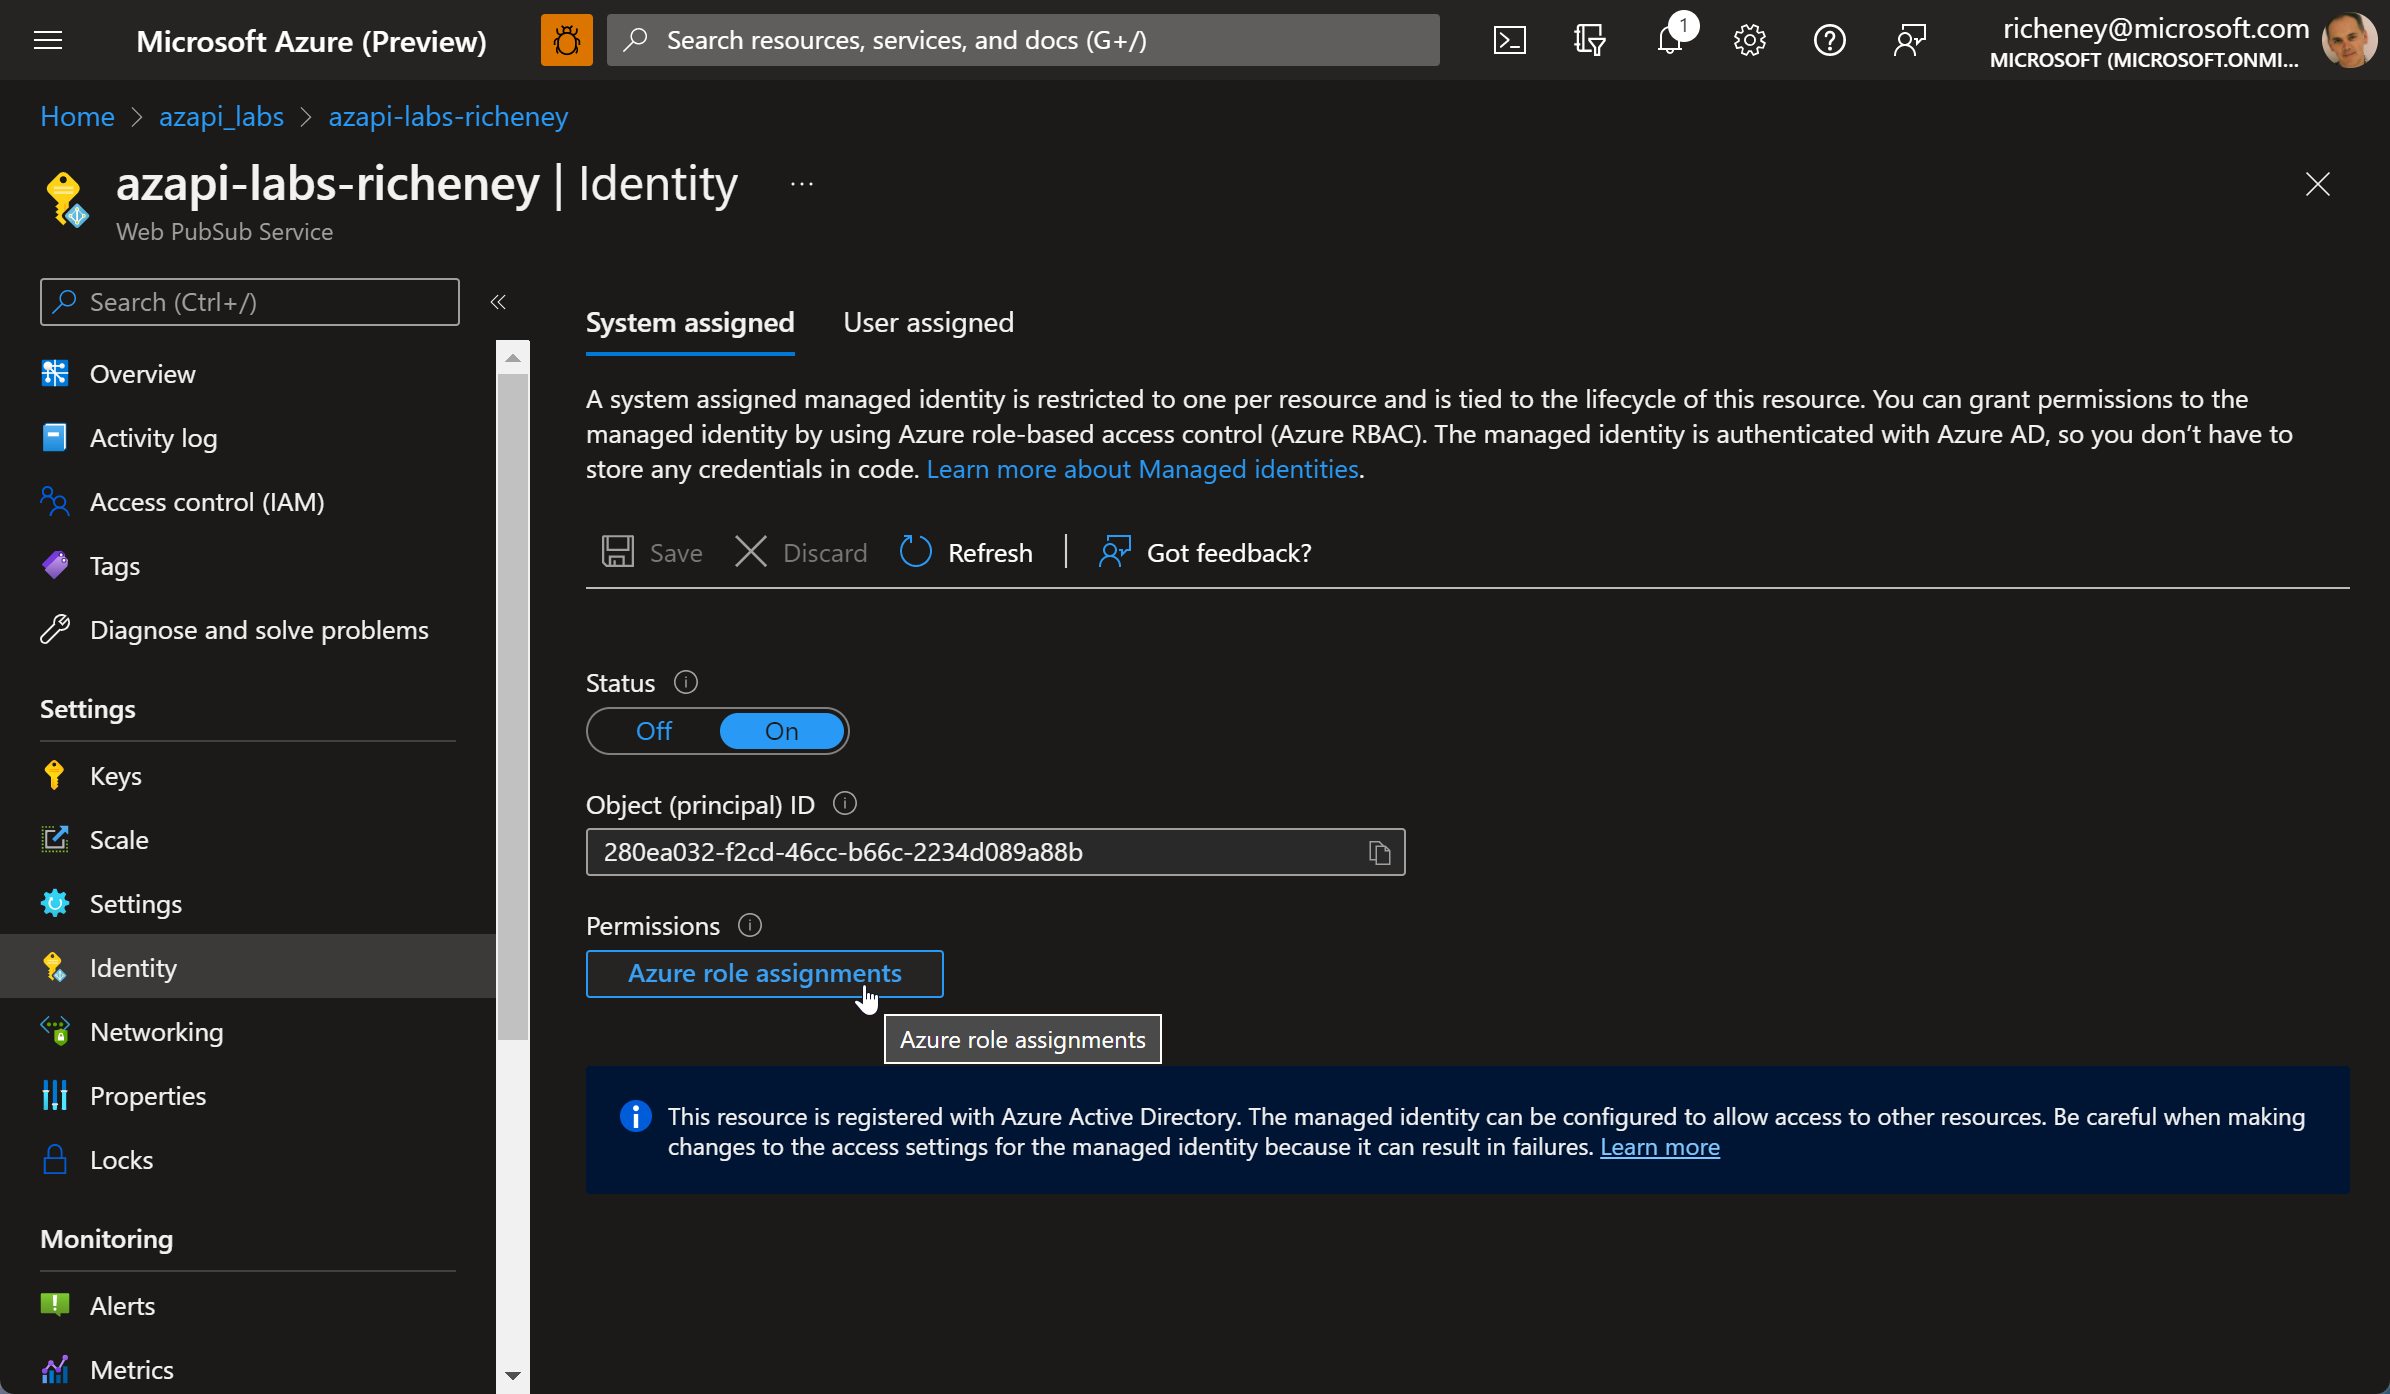
The system assigned identity has been successfully enabled.
-
List the identifiers in state
terraform state listExample output:
azapi_update_resource.webpubsub_identity azurerm_resource_group.azapi_labs azurerm_web_pubsub.webpubsub -
Display the resource attributes from state
terraform state show azapi_update_resource.webpubsub_identityExample output:
# azapi_update_resource.webpubsub_identity:
resource "azapi_update_resource" "webpubsub_identity" {
    body                    = jsonencode(
        {
            identity = {
                type = "SystemAssigned"
            }
        }
    )
    id                      = "/subscriptions/00000000-0000-0000-0000-000000000000/resourceGroups/azapi_labs/providers/Microsoft.SignalRService/WebPubSub/azapi-labs-richeney"
    ignore_casing           = false
    ignore_missing_property = false
    name                    = "azapi-labs-richeney"
    output                  = jsonencode({})
    parent_id               = "/subscriptions/00000000-0000-0000-0000-000000000000/resourceGroups/azapi_labs"
    resource_id             = "/subscriptions/00000000-0000-0000-0000-000000000000/resourceGroups/azapi_labs/providers/Microsoft.SignalRService/WebPubSub/azapi-labs-richeney"
    type                    = "Microsoft.SignalRService/WebPubSub@2021-10-01"
}
Summary
You have successfully used the azapi provider to update a resource via the REST API.
The only issue is that the azapi_update_resource does not export all of the attributes, including the object id for the system assigned managed identity.
That would be useful if the config needs to create an azurerm_role_assignment, or at least output the object ID.
Move on to the next lab and we’ll use the azapi’s data source.