Private Link Service
As an ISV, you can leverage Private Link Service to provide secure private endpoints for your own applications to your end customers. In this lab you'll use an internal load balancer on a few VMs and then provide a private link service before testing it out.
Introduction
There is a hidden Private Link Service for every Azure service that offers Private Endpoint functionality. Private Link allows Private Endpoints to connect securely to Private Link Service.
The good news for ISVs and SIs hosting their applications on Azure is that they can offer the same functionality to their end customers using the Private Link Service. This opens up a number of new opportunities with a clean and safe onboarding process for customers who want secure private network access to your SaaS offering. Historically there have been concerns for ISVs deploying their software into customer environments if that exposes their intellectual property, and Private Links Service (PLS) gives a viable option that protects that IP.
The concepts page for Private Link Service is excellent in describing the use and includes this conceptual connectivity picture:
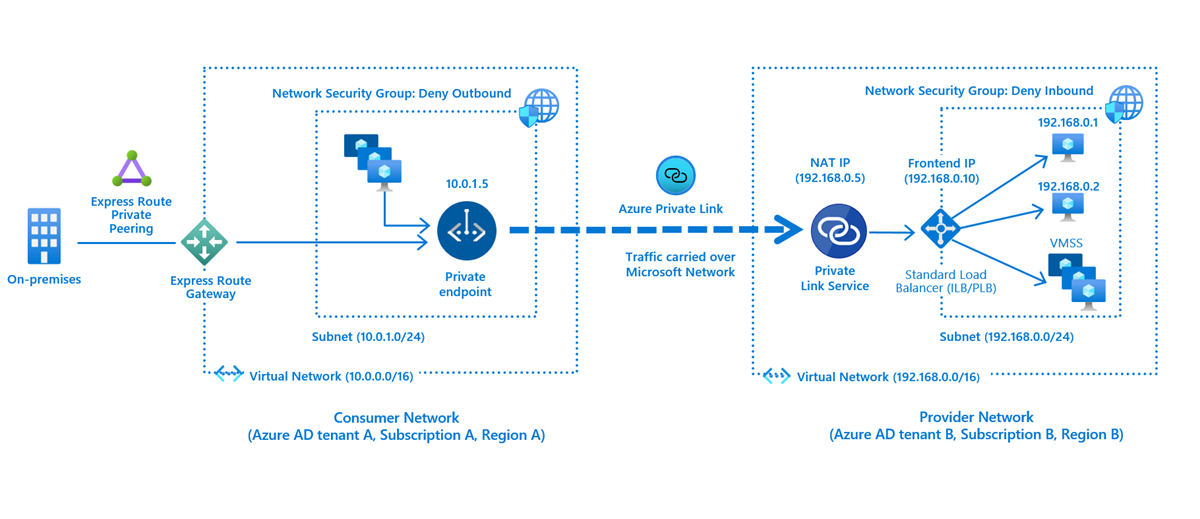
Note that the ip addresses and address spaces in the diagram do not match those used in this lab.
Multiple Private Endpoints can connect to a Private Link Service, and they can exist in different tenants.
Overview
- Clone a Terraform repo
- Deploy an isolated virtual network containing Ubuntu VMs running a basic (and ugly) web server on nginx
- An NSG and ASG to permit port 80 access to the VMs
- The three VMs will be distributed across multiple zones in the region
- This will serve as the ISV application in the lab
- Create a standard load balancer and add the VMs into the back end pool
- Create a Private Link Service connected to the internal load balancer
- Follow the workflow between the customer and provider to establish the connection
- Test the web service is accessible
Choose a tenant and subscription
One of the benefits of private link is that they work in a customer / provider scenario.
If possible, deploy the Terraform resources for this lab in a different tenant to your privatelink microhack environment. (If you don’t have a separate tenant to test with then just continue to work in your usual subscription.)
At the end of the lab we’ll create the private endpoint in the private link microhack environment and consume the private link service. (Some additional commands have been included to recreate resources if you have already removed it.)
Deploy the “application”
Clone a Terraform repo into your home directory and then deploy the “application” environment.
Cloud Shell is recommended as it has the terraform binary include in the Bash container image. (If you have your own Bash environment with terraform, git, jq and the Azure CLI then feel free to use that instead.)
-
Log into Azure
The Cloud Shell will log you in automatically.
az login -
Check your context
Make sure you are in the correct subscription.
az account showIf not then change using
az account set --subscription <subscriptionId>. -
Clone the repo
Make sure that you are in your home directory (
cd ~) and then clone.git clone https://github.com/richeney/pls -
Move to the new subdirectory
cd pls -
Initialise
terraform init -
Deploy
The deployment assumes that you have a default public SSH key at ~/.ssh/id-rsa.pub.
If you do not then you can create one with
ssh-keygen -t rsa.Deploy the base resources:
terraform apply --auto-approveThe deployment should only take a few moments, and the
terraform outputdisplays the VM names and their IP addresses.Example output:
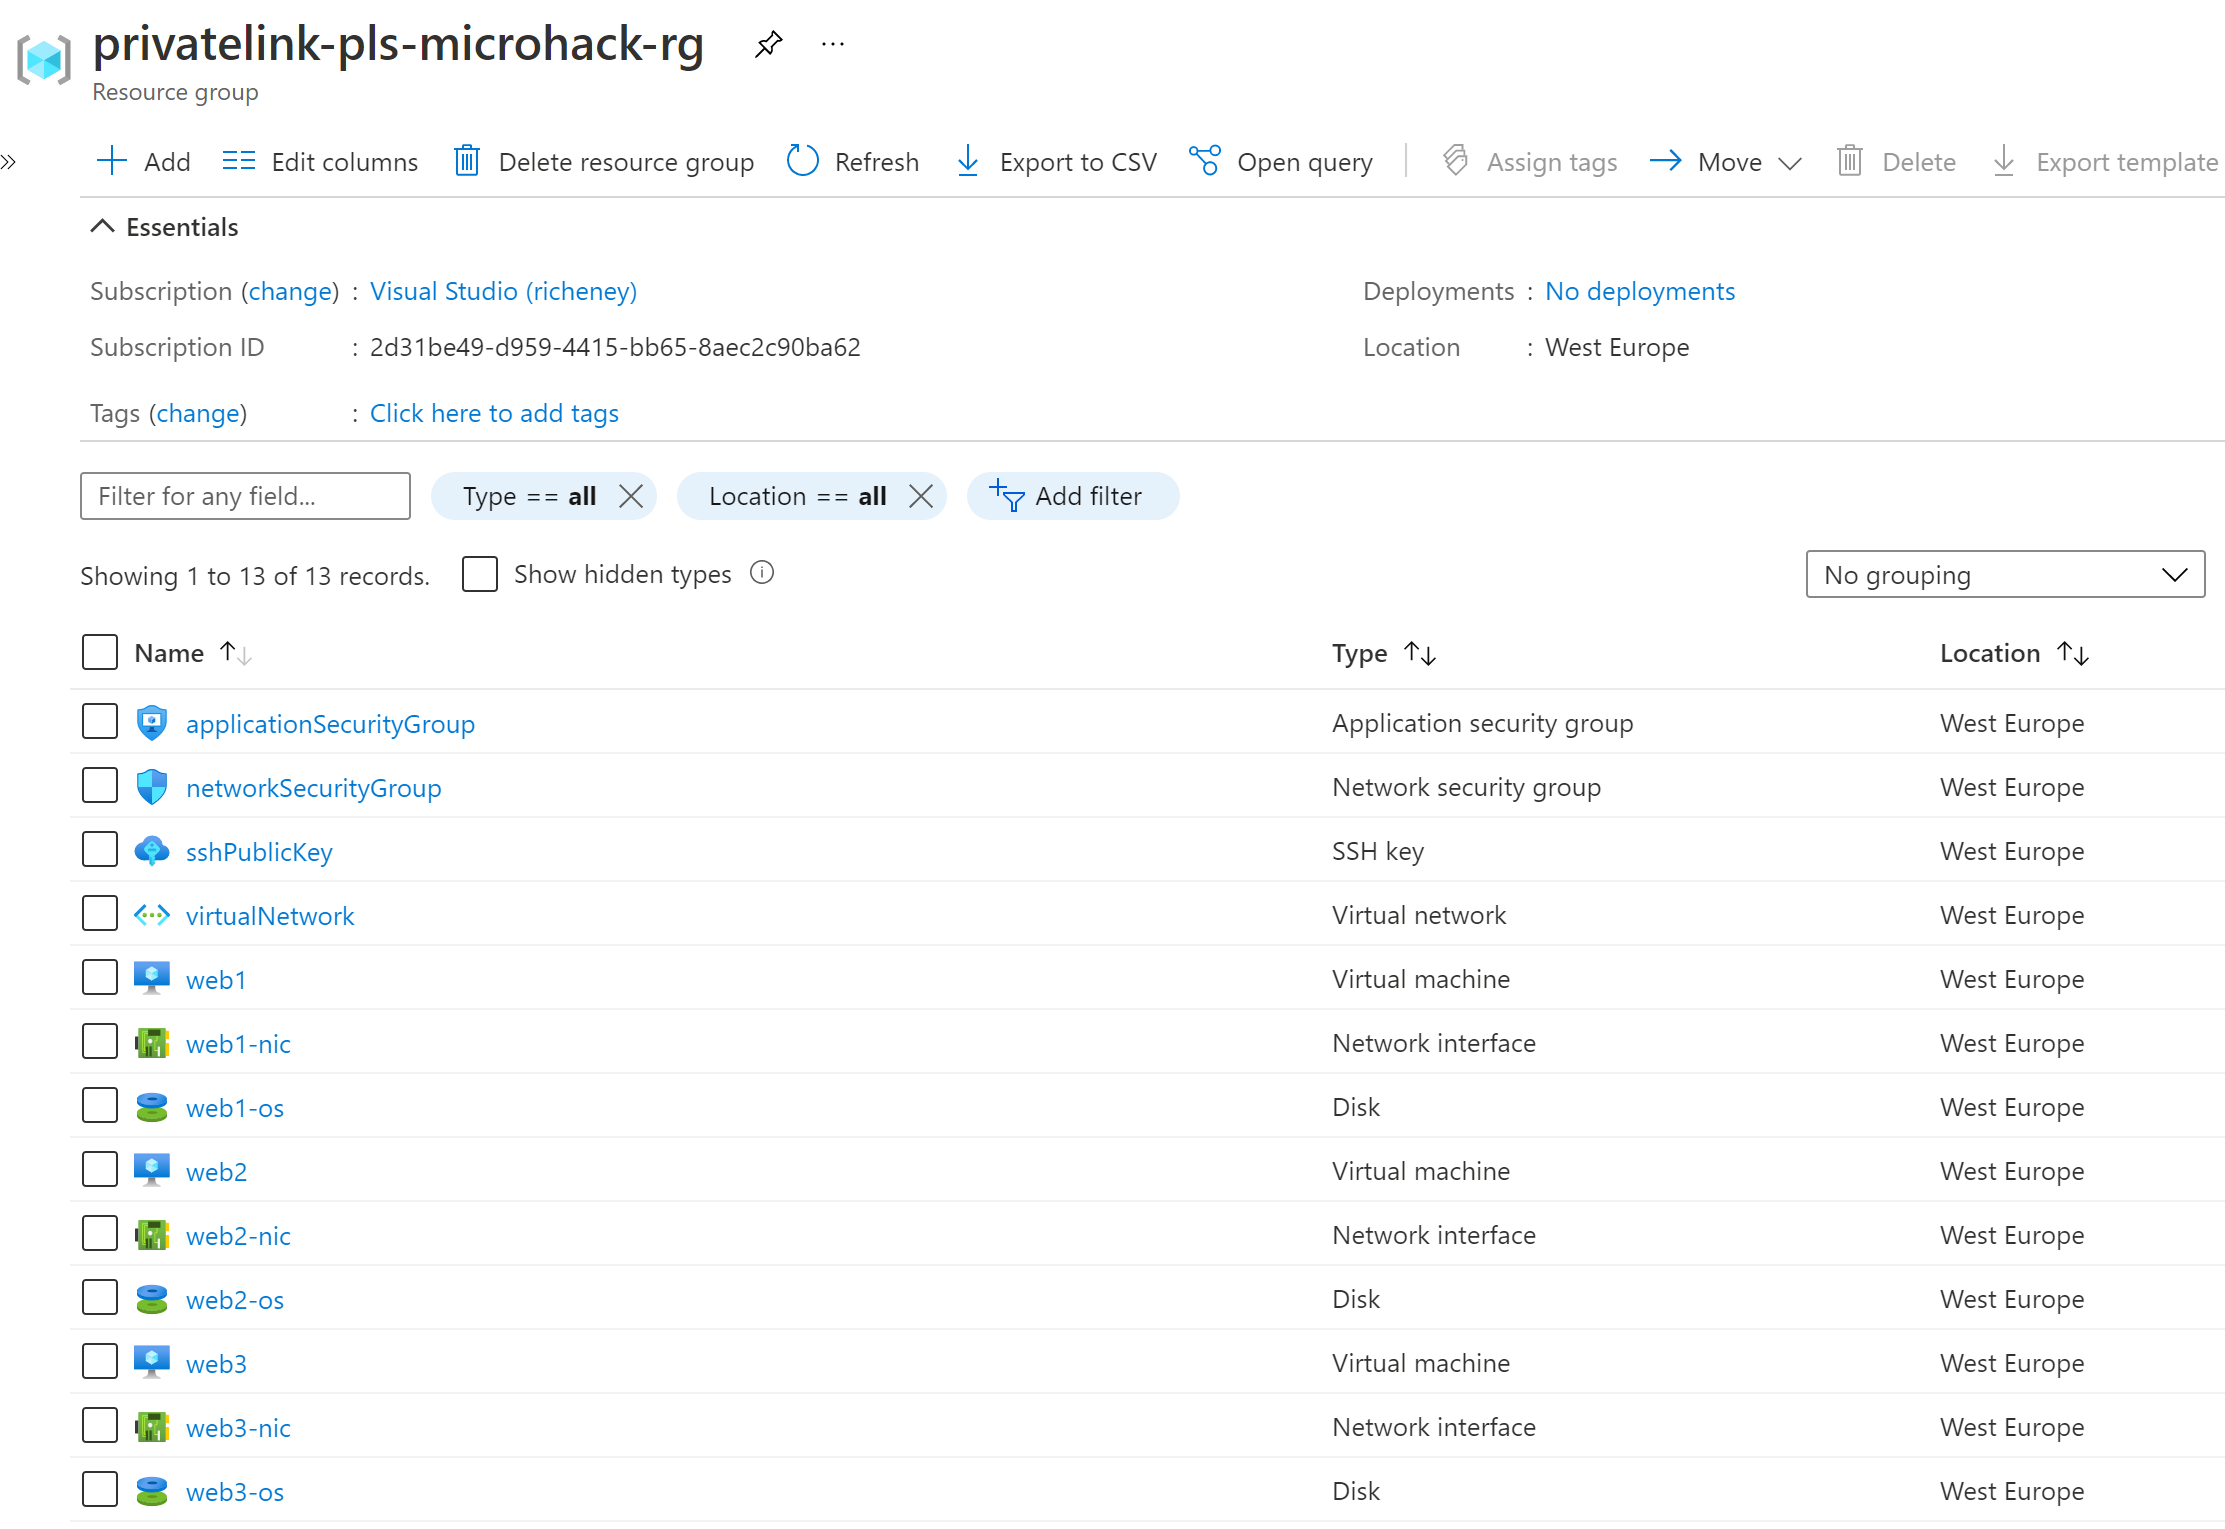
vms = [
  {
    "ip_address" = "10.0.1.5"
    "name" = "web1"
    "zone" = 1
  },
  {
    "ip_address" = "10.0.1.6"
    "name" = "web2"
    "zone" = 2
  },
  {
    "ip_address" = "10.0.1.4"
    "name" = "web3"
    "zone" = 3
  },
]
Check the privatelink-pls-microhack-rg resource group.
Load balancer
Create a standard internal load balancer for the three VMs.
-
Set temporary environment variables
export AZURE_DEFAULTS_GROUP="privatelink-pls-microhack-rg"
export AZURE_DEFAULTS_LOCATION="West Europe"
This sets defaults for the current shell session so you don’t need to set
--resource-groupor--location.If you get logged out of your session then reset these environment variables before continuing.
-
Create the load balancer
az network lb create \ --name loadBalancer \ --sku Standard \ --vnet-name virtualNetwork \ --subnet saas \ --frontend-ip-name loadBalancerFrontEnd \ --backend-pool-name saasBackendPool -
Add the health probe
az network lb probe create \ --lb-name loadBalancer \ --name http \ --protocol tcp \ --port 80 -
Add a load balancer rule
az network lb rule create \
  --lb-name loadBalancer \
  --name http \
  --protocol tcp \
  --frontend-port 80 \
  --backend-port 80 \
  --frontend-ip-name loadBalancerFrontEnd \
  --backend-pool-name saasBackendPool \
  --probe-name http \
  --idle-timeout 15 \
  --enable-tcp-reset true
Add VMs to the backend pool
-
Update the NIC ip configs to specify the load balancer backend pool
ipConfigIds=$(az network nic list --query "[*].ipConfigurations[0].id" --output tsv)
az network nic ip-config update --ids $ipConfigIds --lb-name loadBalancer --lb-address-pools saasBackendPool
Private Link Service
The Private Link Service needs to be in the same region as the Load Balancer. The subnet it is deployed into needs to have the disable-private-link-service-network-policies property set to true.
-
Update the subnet
az network vnet subnet update \ --vnet-name virtualNetwork \ --name saas \ --disable-private-link-service-network-policies true -
Create the Private Link Service
az network private-link-service create \
  --name saasPrivateLinkService \
  --vnet-name virtualNetwork \
  --subnet saas \
  --lb-name loadBalancer \
  --lb-frontend-ip-configs loadBalancerFrontEnd
Private Endpoint Workflow
In the microhack you created a private endpoint which went through an auto-approval process. We’ll now step through the manual process.
Here is the workflow from the concepts page. We have already completed steps 1 and 2.

Each of the steps below matches the diagram, with the persona involved at each point. As you may be swapping between CLI sessions and browser tabs as you play out the process from both side’s point of view then the colours will help remind you to switch from one side to the other.
- ISV 🔵 for the service provider
- Customer 🟢 for the service consumer
OK, let’s step through it and remember to run the commands in the right subscription.
3. Private Link Service ID
ISV 🔵 subscription.
As the ISV, you need to give the ID of your private link service to your customer.
-
Display the Private Link Service ID.
az network private-link-service show --name saasPrivateLinkService --query id --output tsv -
Provide the Private Link Service ID to the customer.
4. Create the Private Endpoint
Customer 🟢 subscription.
-
Set a variable to the Private Link Service ID provided by the ISV
privateLinkServiceId=<providedId> -
Recreate the spoke-vnet and InfrastructureSubnet (if required)
If you’ve no longer got access to the microhack environment then you can use the following code block to recreate a few resources.
az group create --name privatelink-dns-microhack-rg --location "West Europe"

az network vnet create --name spoke-vnet --address-prefixes 10.1.0.0/16 \
  --resource-group privatelink-dns-microhack-rg --location "West Europe"

subnetId=$(az network vnet subnet create --name InfrastructureSubnet \
  --address-prefixes 10.1.0.0/24 --vnet-name spoke-vnet \
  --disable-private-endpoint-network-policies true \
  --resource-group privatelink-dns-microhack-rg \
  --query id --output tsv)

az network private-dns zone create \
    --resource-group privatelink-dns-microhack-rg \
    --name "privatelink.azurewebsites.net"

az network private-dns link vnet create \
    --resource-group privatelink-dns-microhack-rg \
    --zone-name "privatelink.azurewebsites.net" \
    --name dnsLink --virtual-network spoke-vnet \
    --registration-enabled false

az vm create --name testVM \
  --vnet-name spoke-vnet --subnet InfrastructureSubnet \
  --image win2019datacenter \
  --admin-username azureuser --admin-password Microhack2021 \
  --resource-group privatelink-dns-microhack-rg --location "West Europe"
Note the public IP address for the testVM.
-
Create the private endpoint, specifying the provided private link service ID
az network private-endpoint create \
  --connection-name connectionToSaasService \
  --name saasPrivateEndpoint \
  --private-connection-resource-id $privateLinkServiceId \
  --resource-group privatelink-dns-microhack-rg --location "West Europe" \
  --vnet-name spoke-vnet --subnet InfrastructureSubnet \
  --manual-request true \
  --request-message "Customer: Tradewinds, Order no.: 314159"
Note the manual request and the message.
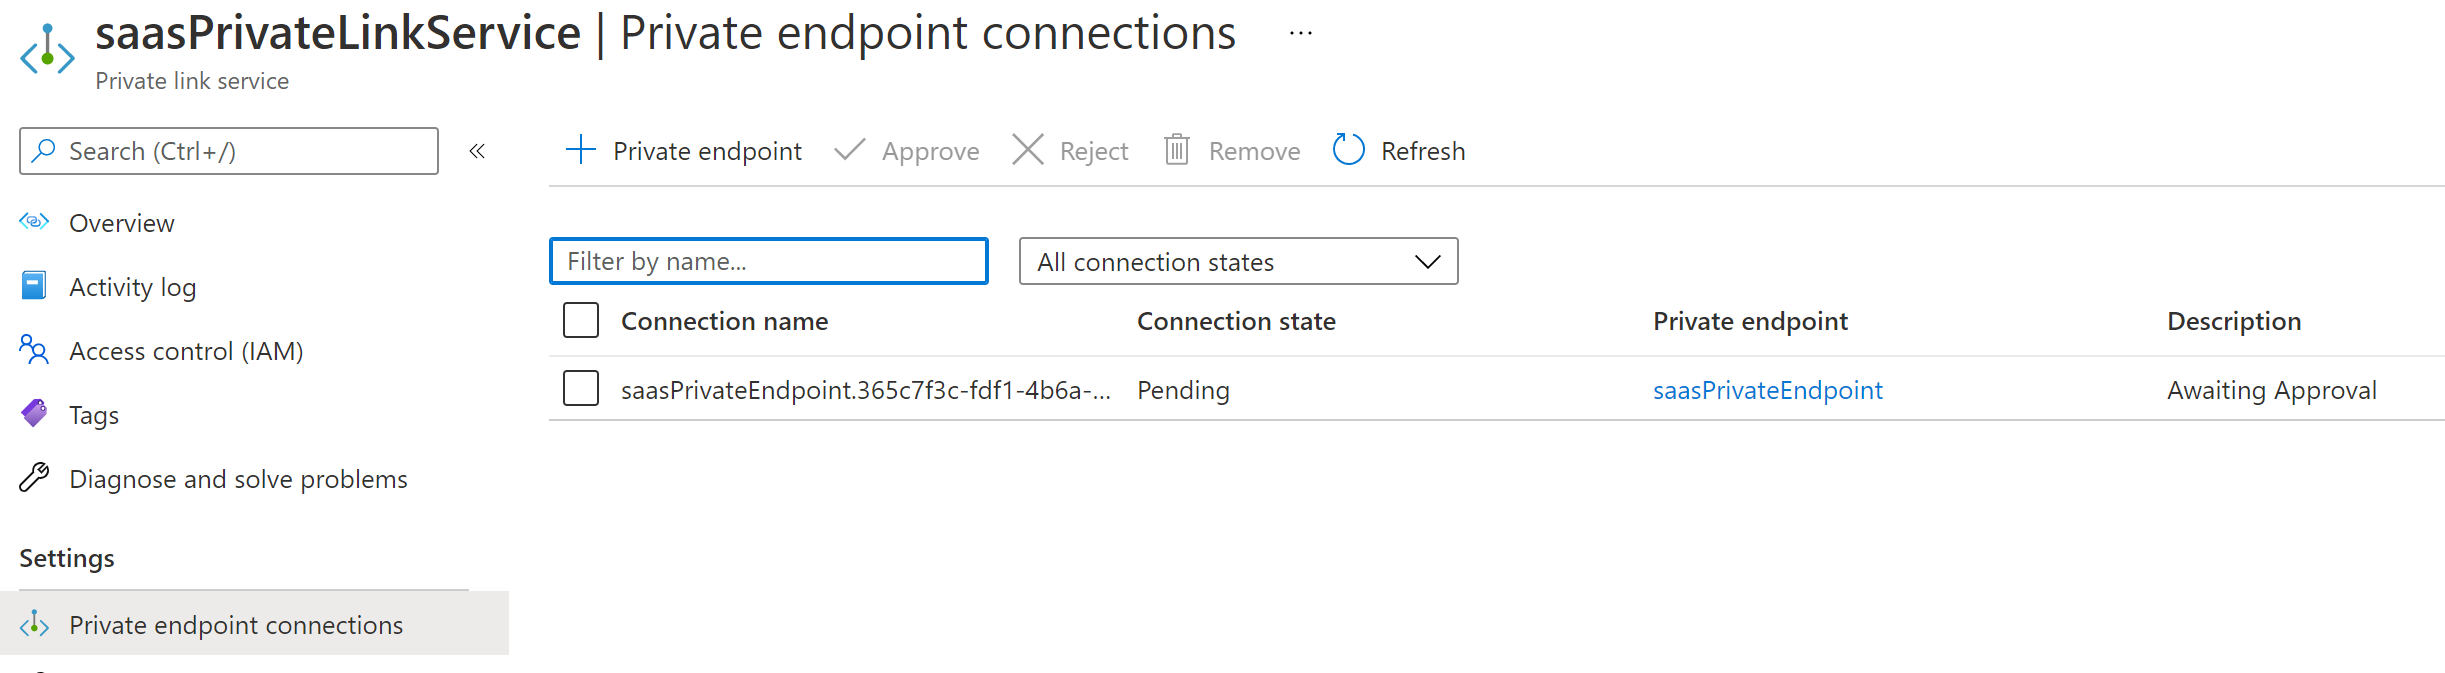
5. Approve or reject the request
ISV 🔵 subscription.
The message from the customer is sent to the ISV.
-
View the request in the portal.
-
Approve the connection
Select the request and click on Approve.
6. Configure the DNS record
Customer 🟢 subscription.
When we created a private endpoint to one of the Azure PaaS services, we had to use split horizon DNS with a Private DNS zone linked to the virtual network so that the DNS lookup resolved the FQDN to the private IP address of the private endpoint.
Connecting to a private link service is different. As there is no public DNS record to override, you only need to create your own DNS record. That can be in a standard Azure DNS zone, or your custom / on prem DNS. No need to use a Private DNS zone. As long as the DNS resolves to the private IP address then you’re good.
-
Show the private endpoint’s IP
You can browse to the private endpoint’s associated NIC and see the private IP address, or run these CLI commands.
privateLinkNicId=$(az network private-endpoint show \ --name saasPrivateEndpoint \ --resource-group privatelink-dns-microhack-rg \ --query networkInterfaces[0].id --output tsv) az network nic show --ids $privateLinkNicId \ --query ipConfigurations[0].privateIpAddress --output tsv -
Create a DNS record (optional)
Add the IP address as an A record called saas-pls.
If you haven’t got a standard DNS Zone or custom DNS then you can skip and just use the IP address.
Test
-
Log on to the VM. Either
- connect over Bastion to az-mgmt-vm
- connect over RDP to the testVM
-
Browse to either
http://saas-pls.yourdomain.comhttp://\<privateLinkIp>
You should open a basic web page showing
Host: <hostname>.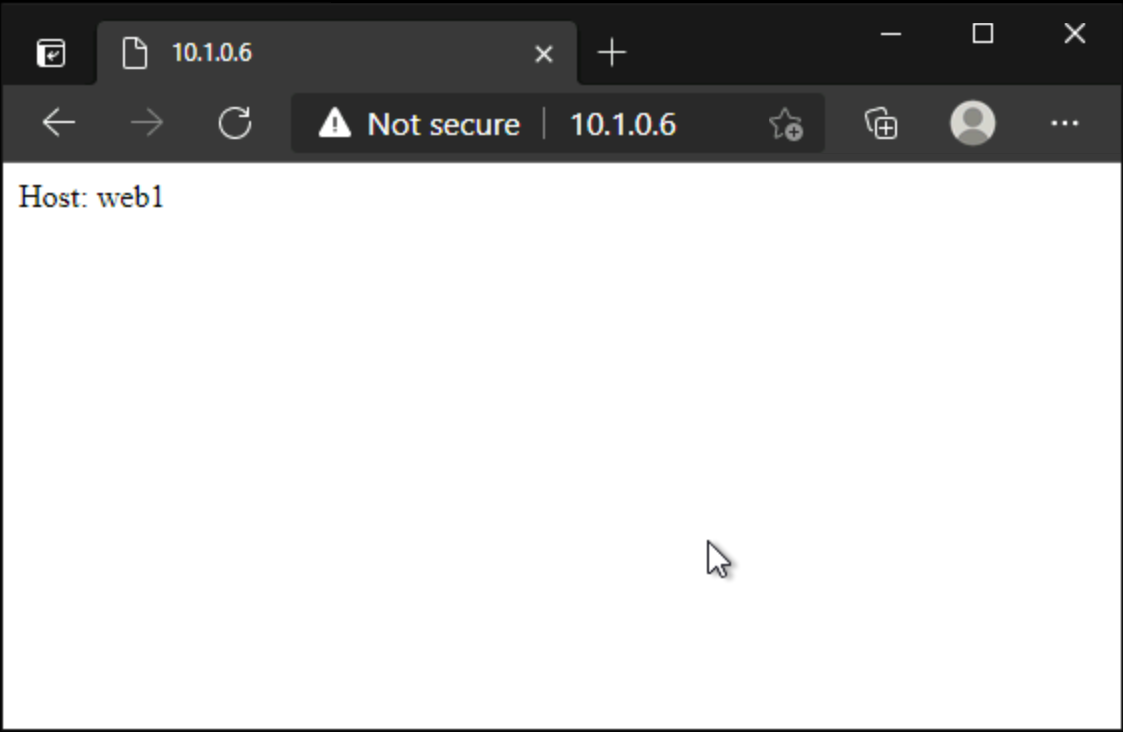
If so, success! (I did say that it would be ugly.)
But the VM is connecting using private link to a private link service fronted SaaS application running in another tenant, which is a beautiful thing.
Cleanup
Delete the saasPrivateEndpoint private endpoint in your customer 🟢 subscription.
az network private-endpoint delete \
      --name saasPrivateEndpoint \
      --resource-group privatelink-dns-microhack-rg
Delete the privatelink-pls-microhack-rg resource group in your ISV 🔵 subscription.
az group delete --yes --name privatelink-pls-microhack-rg
The privatelink-pls-microhack-rg resource group in your customer 🟢 subscription is also used for the Private Link DNS microhack and for the vNet Integration. If you no longer need it then:
az group delete --yes --name privatelink-dns-microhack-rg
You may also unset the two environment variables for this session.
unset AZURE_DEFAULTS_GROUP AZURE_DEFAULTS_LOCATION
Resources
- https://docs.microsoft.com/azure/private-link/private-link-service-overview
- https://docs.microsoft.com/azure/private-link/create-private-link-service-cli
Help us improve
Azure Citadel is a community site built on GitHub, please contribute and send a pull request
Make a change