Network Security Groups
Need a L4 ACL to control permitted flows? Create Network Security Groups (NSGs) using Application Security Groups (ASGs).
Lab Overview
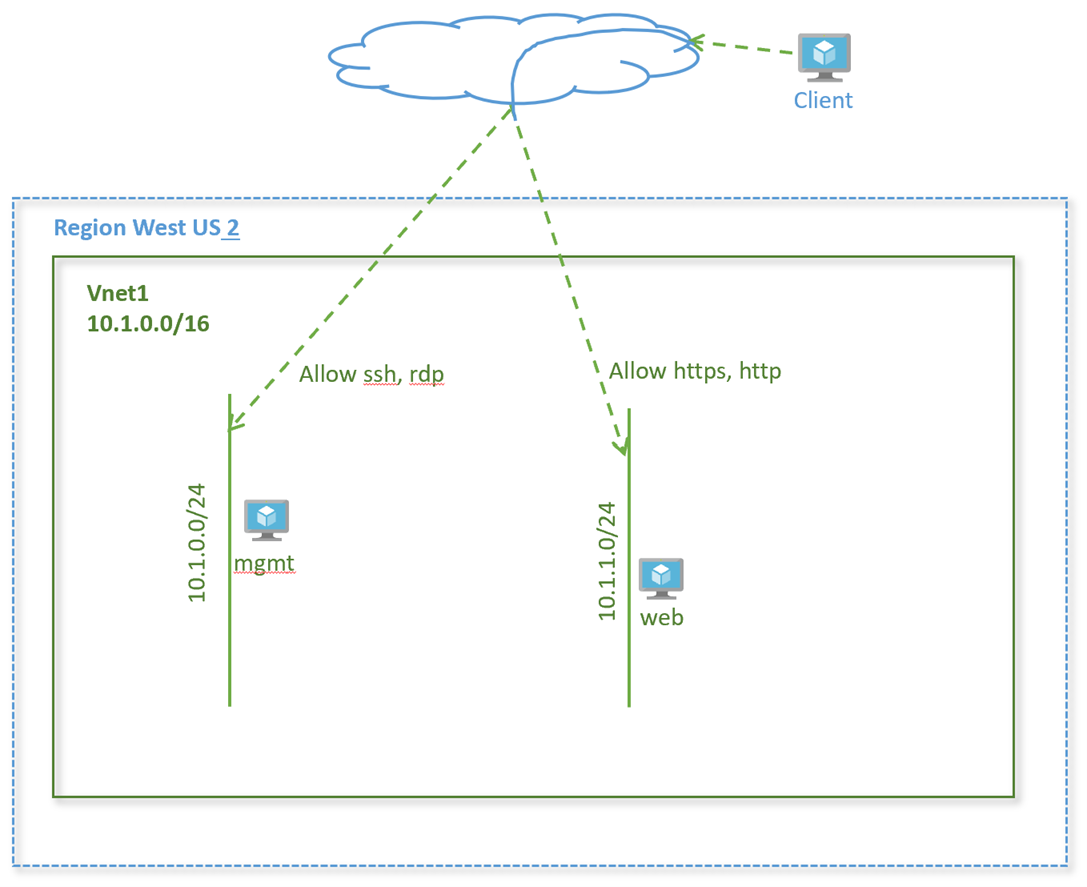
In this lab, we will see how to create network security groups. Network Security Groups enable restricting flows at a subnet or at a virtual machine’s network interface level. We will create rules and apply at a subnet level. We will also see how application security groups are applied.
Lab Diagram

Create application security groups
An application security group enables you to group together servers with similar functions, such as web servers.
-
Select + Create a resource on the Azure portal
-
In the Search the Marketplace box, enter Application security group. When Application security groups appears in the search results, select it.
-
Click +Add. Enter, or select, the following information:
Setting Value Subscription Select your subscription Resource group Select rg-lab from the dropdown Name mgmt Location West US 2 -
Click Review+Create
-
Once validation passes, click Create
-
Repeat steps 3, specifying the following values:
Setting Value Subscription Select your subscription Resource group Select rg-lab from the dropdown Name web Location West US 2
Associate ASG to network interface
- In the Search resources, services, and docs box at the top of the portal, begin typing virtual machines. From the search results, select Virtual machines.
- Select virtual machine vnet1-vm-mgmt1
- Under Settings → Networking → Application security groups, select Configure the application security groups, select mgmt for Application security groups, and then select Save
- Repeat steps 1-3 for virtual machines vnet1-vm-web1 and add application group web
Create a network security group
-
In the Search resources, services, and docs box at the top of the portal, begin typing Network security group. From the search results, select Network security group.
-
Click +Add. Enter, or select, the following information.
Setting Value Subscription Select your subscription. Resource group Select rg-lab from the dropdown. Name nsg1 Location West US 2 -
Click Review+Create. Once validation passes, Create.
Create security rules
Create a security rule to allow SSH and RDP to the management servers.
-
On the network security groups page, click on the network security group nsg1 you just created.
-
Go to Settings → Inbound security rules and click +Add.
-
Enter, or select the following values, accept the remaining defaults, and then select Add:
Setting Value Destination Select Application security group Destination Application security group mgmt Destination port ranges 22, 3389 Protocol TCP Priority 100 Name allow-mgmt-access -
Create another security rule that allows http and https traffic to the web application security group.
Setting Value Destination Select Application security group Destination Application security group web Destination port ranges 80,443 Protocol TCP Priority 120 Name allow-web
Associate network security group to subnet
- On the Network security groups page, click on the security group nsg1
- Under Settings, select Subnets and then select + Associate
- Under Associate subnet, select Virtual network and then select vnet1. Select Subnet, select vnet1-subnet1, and then select OK.
- Repeat step 3 to associate to subnet vnet1-subnet2 from vnet1
Verify NSG for the virtual machine
-
Go to the virtual machine vnet1-vm-mgmt1.
-
Got to Settings → Networking.
-
Check the network security group nsg1 is applied to the subnet vnet-subnet1.
-
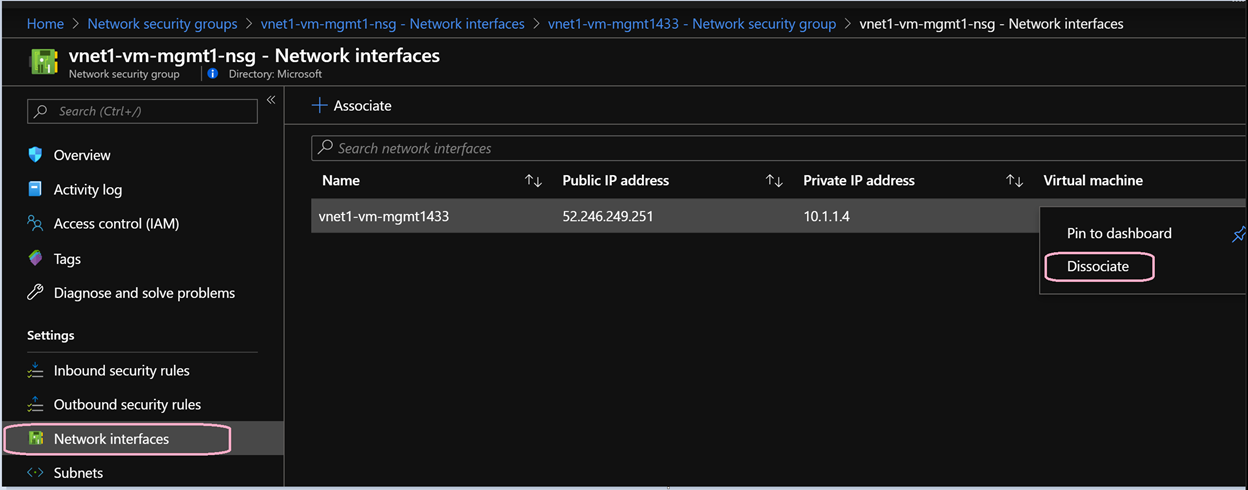
You will also see another security group vnet1-vm-mgmt1-nsg attached to the network interface of the virtual machine. This was created when you created the VM and assigned Basic network security group as default configuration setting. You can go ahead and disassociate this security group from the network security group as we now have one applied at the subnet level. Note the name of the security group.
-
Click on the network security group attached to the interface.
-
Go to Settings → Network interfaces.
-
Click on the three dots … on the right and click Dissociate.

-
Repeat above steps for each VM created with a basic network security group
Verify Security rules
It’s time to see the rules in action.
Connect to the management server
- From your laptop, SSH to the management server
- SSH to vnet1-vm-mgmt1 using its public IP address
- Verify you are successfully able to login
Which rule enabled ssh access?
Connect to the web server
- From your laptop, SSH to the web server
- SSH to vnet1-vm-web1
Are you able to reach the login prompt? Which rule was used for this flow?
Conclusion
We learnt how to configure network security groups and application security groups to protect your compute instances in Azure.
Challenge
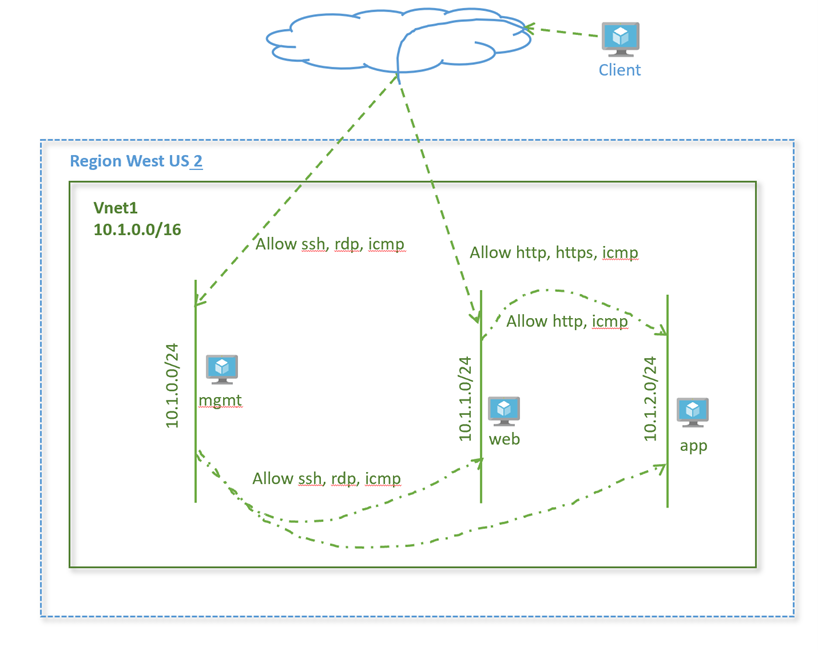
Complete additional flows as given in the diagram below to restrict traffic further within your virtual network. Make sure only this traffic is allowed.

Help us improve
Azure Citadel is a community site built on GitHub, please contribute and send a pull request
Make a change