Configure a workload identity
Configure a managed identity ready for use with the fabric Terraform provider in a pipeline context.
Introduction
On this page we will create a managed identity that can be used by CI/CD pipelines and configuring the Fabric tenant settings to permit its use. You will also add some additional permissions, at the very least the Storage Blob Data Contributor role for the storage account.
Note that this will won’t touch any CI/CD platform specifics until the following GitHub page. This will be a cleaner break point for those of you who want to look at Azure DevOps or GitLab as alternatives to using GitHub as we will follow a similar process.
The process follows the Creating an App Registration for the Service Principal context (SPN) page but for a user assigned managed identity instead of a service principal.
Service Principal / Managed Identity overview
Is the service principal / managed identity configuration non-standard for Fabric?
A little, yes. It is defined by the Fabric REST API authentication that propagates through the Go SDK for Fabric.
There is a tenant setting in the Fabric admin pages, “Service principals can use Fabric APIs”, and this can be configured either
- for all service principals, or
- to a specific Entra security group
So no role API permissions?
No. Usually when looking at app registrations and API permissions you have either
- Delegated API permissions for delegated access or user impersonation, which is access on behalf of a user. Also known as scoped permissions.
- Role API permissions for apps that require standalone authentication and authorisation.
With the Fabric model it allows either service principals or managed identities, but it does not make use of app roles and therefore is no granularity to control which REST API calls are permitted. The only real control point is the tenant setting.
Could I use a managed identity?
Yes, and we are here. We will define a managed identity and use it for fabric terraform provider. You can also create add Azure RBAC role assignments for the azurerm and azapi providers. We’ll add one for writing remote state as a blob to the storage account. We’ll also show how to add app roles for the Microsoft Graph for the azuread provider.
Managed identities are a good security recommendation when combined with OpenId Connect as there is no risk of secret leakage or burden of secret rotation.
Creating a managed identity
We will create the user assigned managed identity in the same resource group as the storage account you made earlier.
-
Define variables
Set the resource group name and region
rg=terraform loc=uksouth managed_identity_name="mi-terraform" management_subscription_id="<subscription_guid>" -
Switch subscriptions (optional)
If you created the terraform resource group in another subscription then switch to it now. For example:
az account set --subscription <management subscription> -
Create the user assigned managed identity
az identity create --name fabric_terraform_provider --resource-group $rg --location $loc
Add to an Entra ID security group (optional)
This step is recommended but you will need the appropriate permissions to create groups within Entra ID.
-
Create the group
az ad group create --display-name "Microsoft Fabric Workload Identities" --description "Service Principals and Managed Identities used for Fabric automation." --mail-nickname FabricWorkloadIdentities -
Add the managed identity
objectId=$(az identity show --name fabric_terraform_provider --resource-group $rg --query principalId -otsv)
az ad group member add --group "Microsoft Fabric Workload Identities" --member-id $objectId
Enable use within Fabric
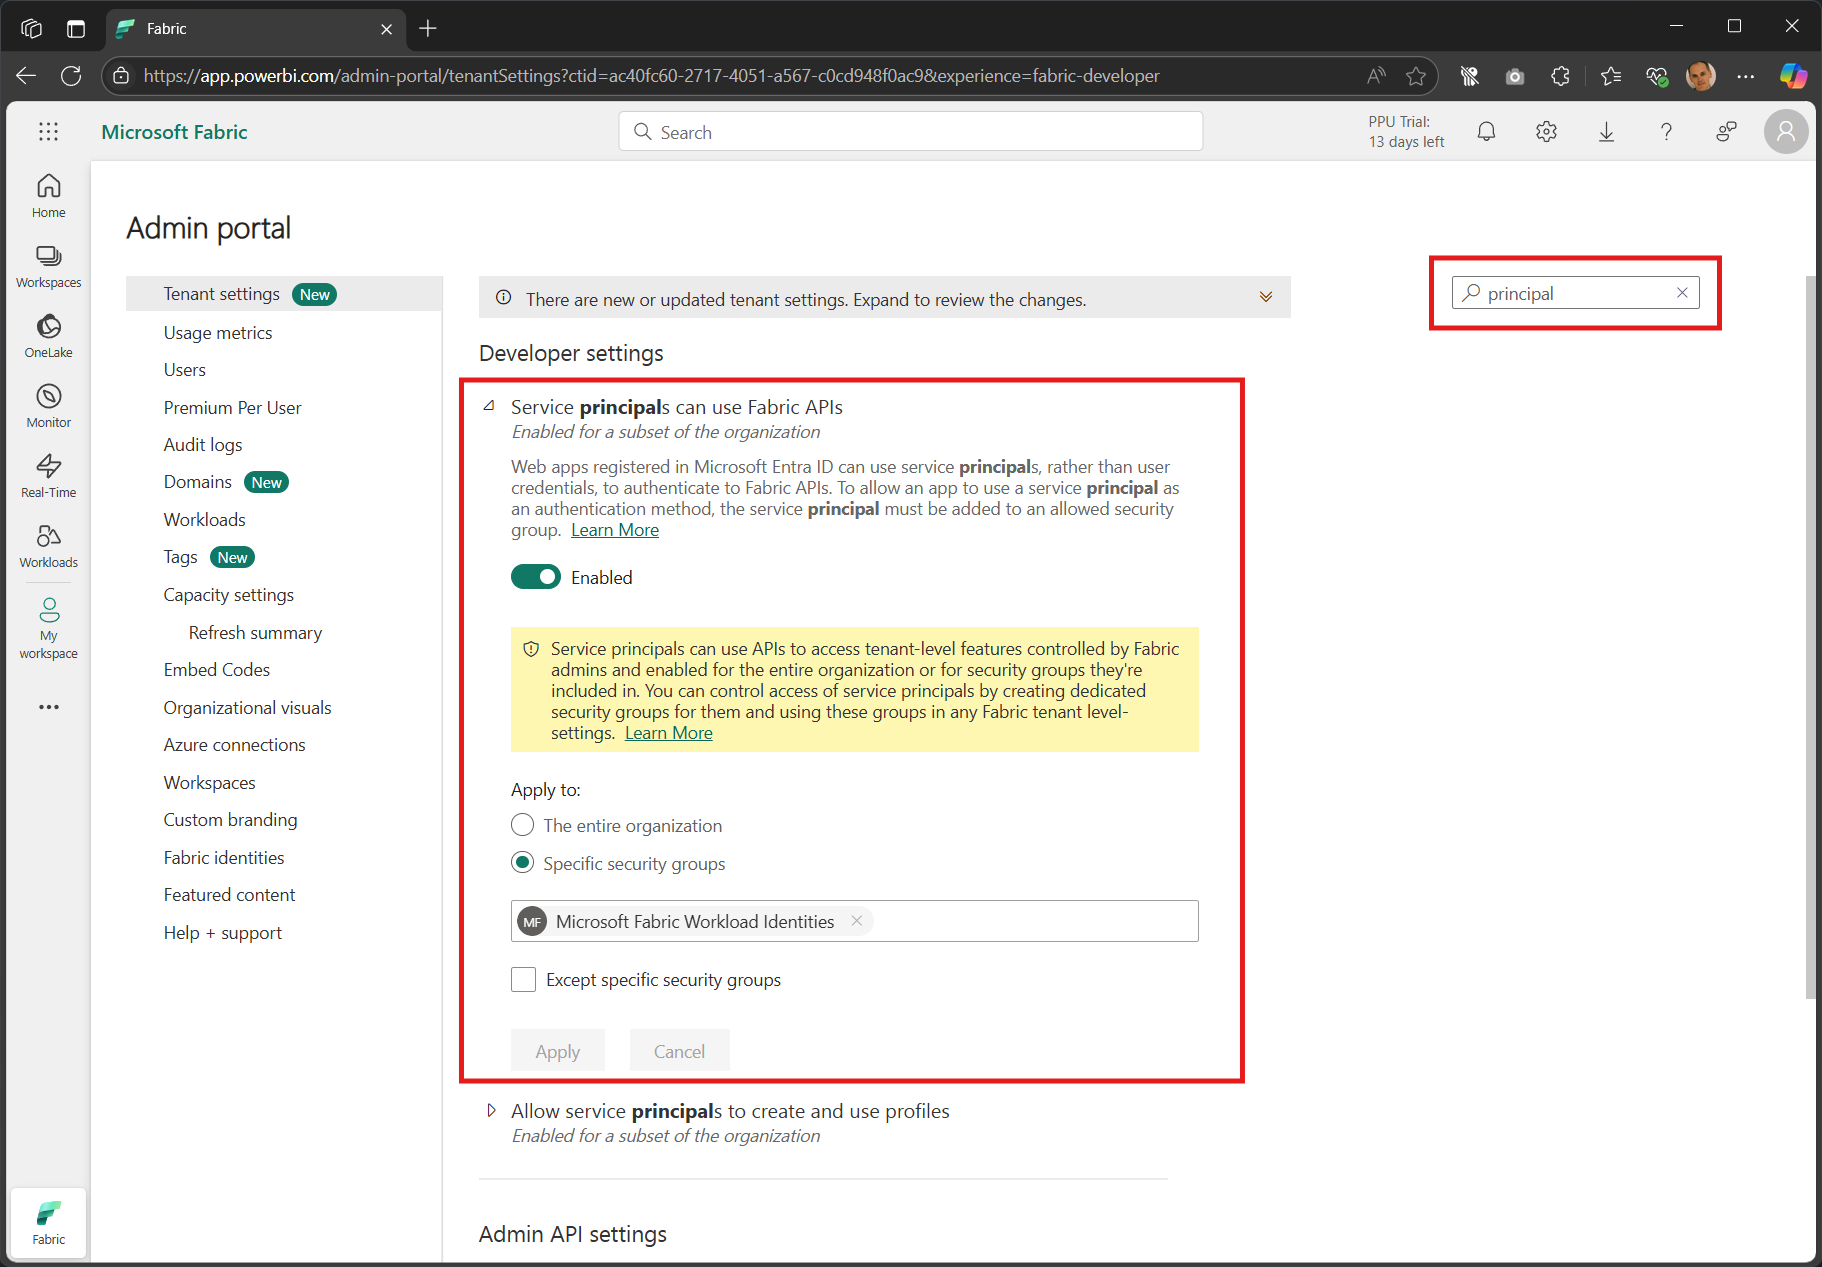
Configure Developer settings in Tenant settings
-
Open Fabric Portal
- click on the bottom left to toggle between Power BI and Fabric experiences
-
click on the Settings cog at the top right
-
Admin Portal
-
Tenant settings
- filter on “principal”
- the Developer Settings sections should come immediately into view
-
Toggle to Enabled
-
Set apply to either
- the entire organisation
- a specific security group (preferred)
Add access to the capacity (F-SKU only)
You can either add it as an Administrator to the F-SKU or a Contributor.
Administrator
-
Variables
identity_name="fabric_terraform_provider" identity_resource_group="terraform" capacity_name="example" capacity_resource_group="fabric" -
Work out the extended administrators property
identityObjectId=$(az identity show --name fabric_terraform_provider --resource-group terraform --query principalId -otsv)
current=$(az fabric capacity show --name example --resource-group fabric --query administration.members -ojson)
updated=$(jq -c --arg oid "$identityObjectId" '. + [$oid]|{members: .}' <<< $current)
Note that in the administrators array you must specify the
- user principal name (UPN) for users
- object ID for workload identities (service principals and managed identities)
-
Update the Fabric SKU
az fabric capacity update --name example --resource-group fabric --administration $updatedExample output:
{
  "administration": {
    "members": [
      "admin@MngEnvMCAP520989.onmicrosoft.com",
      "806dac5a-24b9-49ae-8e2b-4b777e8eaaf8"
    ]
  },
  "id": "/subscriptions/73568139-5c52-4066-a406-3e8533bb0f15/resourceGroups/fabric/providers/Microsoft.Fabric/capacities/example",
  "location": "UK South",
  "name": "example",
  "provisioningState": "Succeeded",
  "resourceGroup": "fabric",
  "sku": {
    "name": "F2",
    "tier": "Fabric"
  },
  "state": "Active",
  "tags": {},
  "type": "Microsoft.Fabric/capacities"
}
Azure RBAC role assignments
The identity needs to be able to write to the storage account’s prod container for the Terraform state file.
-
Assign Storage Blob Data Contributor to the prod container
objectId=$(az identity show --name fabric_terraform_provider --resource-group $rg --query principalId -otsv) storageAccountId=$(az storage account list --resource-group terraform --query "[?starts_with(name, 'terraformfabric')]|[0].id" -otsv) az role assignment create --assignee-object-id $objectId --assignee-principal-type ServicePrincipal --scope "$storageAccountId/blobServices/default/containers/prod" --role "Storage Blob Data Contributor" -
Assign additional roles as required (optional)
For example:
scope="/subscriptions/$(az account show --name "<fabric subscription>" --query id -otsv)
az role assignment create --assignee-object-id $objectId --assignee-principal-type ServicePrincipal --scope "$scope" --role "Contributor"
Entra ID app roles (optional)
You can also add app roles to the managed identity for use with Microsoft Graph and other APIs. As an example, here are the steps to add User.Read.All and Group.Read.All if you want to use the data sources in the azuread provider.
⚠️ This section is entirely optional and a little lengthy, so feel free to skip to Next.
This configuration is not as common for managed identities as it is for service principals. It requires a few REST API calls if you’re not using PowerShell. This section makes use of jq.
-
Get the objectId for the Graph App ID
The Graph App ID is a well known value and is consistent across all tenants, but the REST API calls need the objectId and this is unique within each tenant.
graph_app_id="00000003-0000-0000-c000-000000000000" graph_object_id=$(az ad sp show --id "$graph_app_id" --query id -otsv) -
Set the roles
roles="User.Read.All Group.Read.All"To display all possible roles:
az ad sp show --id 00000003-0000-0000-c000-000000000000 --query "appRoles[].value" -otsv -
Set the main part of the URI
objectId=$(az identity show --name fabric_terraform_provider --resource-group $rg --query principalId -otsv) uri="https://graph.microsoft.com/v1.0/servicePrincipals/${objectId}" -
Create the app roles
Loop through the appRoleIs, generating the JSON body and calling the API**
for role in $roles
do
  app_role_id=$(az ad sp show --id $graph_app_id --query "appRoles[?value == '"$role"'].id" -otsv)
  body=$(jq -nc --arg graph "$graph_object_id" --arg mi "$managed_identity_object_id" --arg role "$app_role_id" '{principalId:$mi,resourceId:$graph,appRoleId:$role}')
  echo "Adding app role $role:"
  jq . <<< $body
  az rest --method post --uri "${uri}/appRoleAssignments" --body "$body"
done
An example JSON body for User.ReadBasic.All would be:
{ "principalId": "<objectId for the managed identity>", "resourceId":"<objectId for the Microsoft Graph in my tenant>", "appRoleId":"5b567255-7703-4780-807c-7be8301ae99b" } -
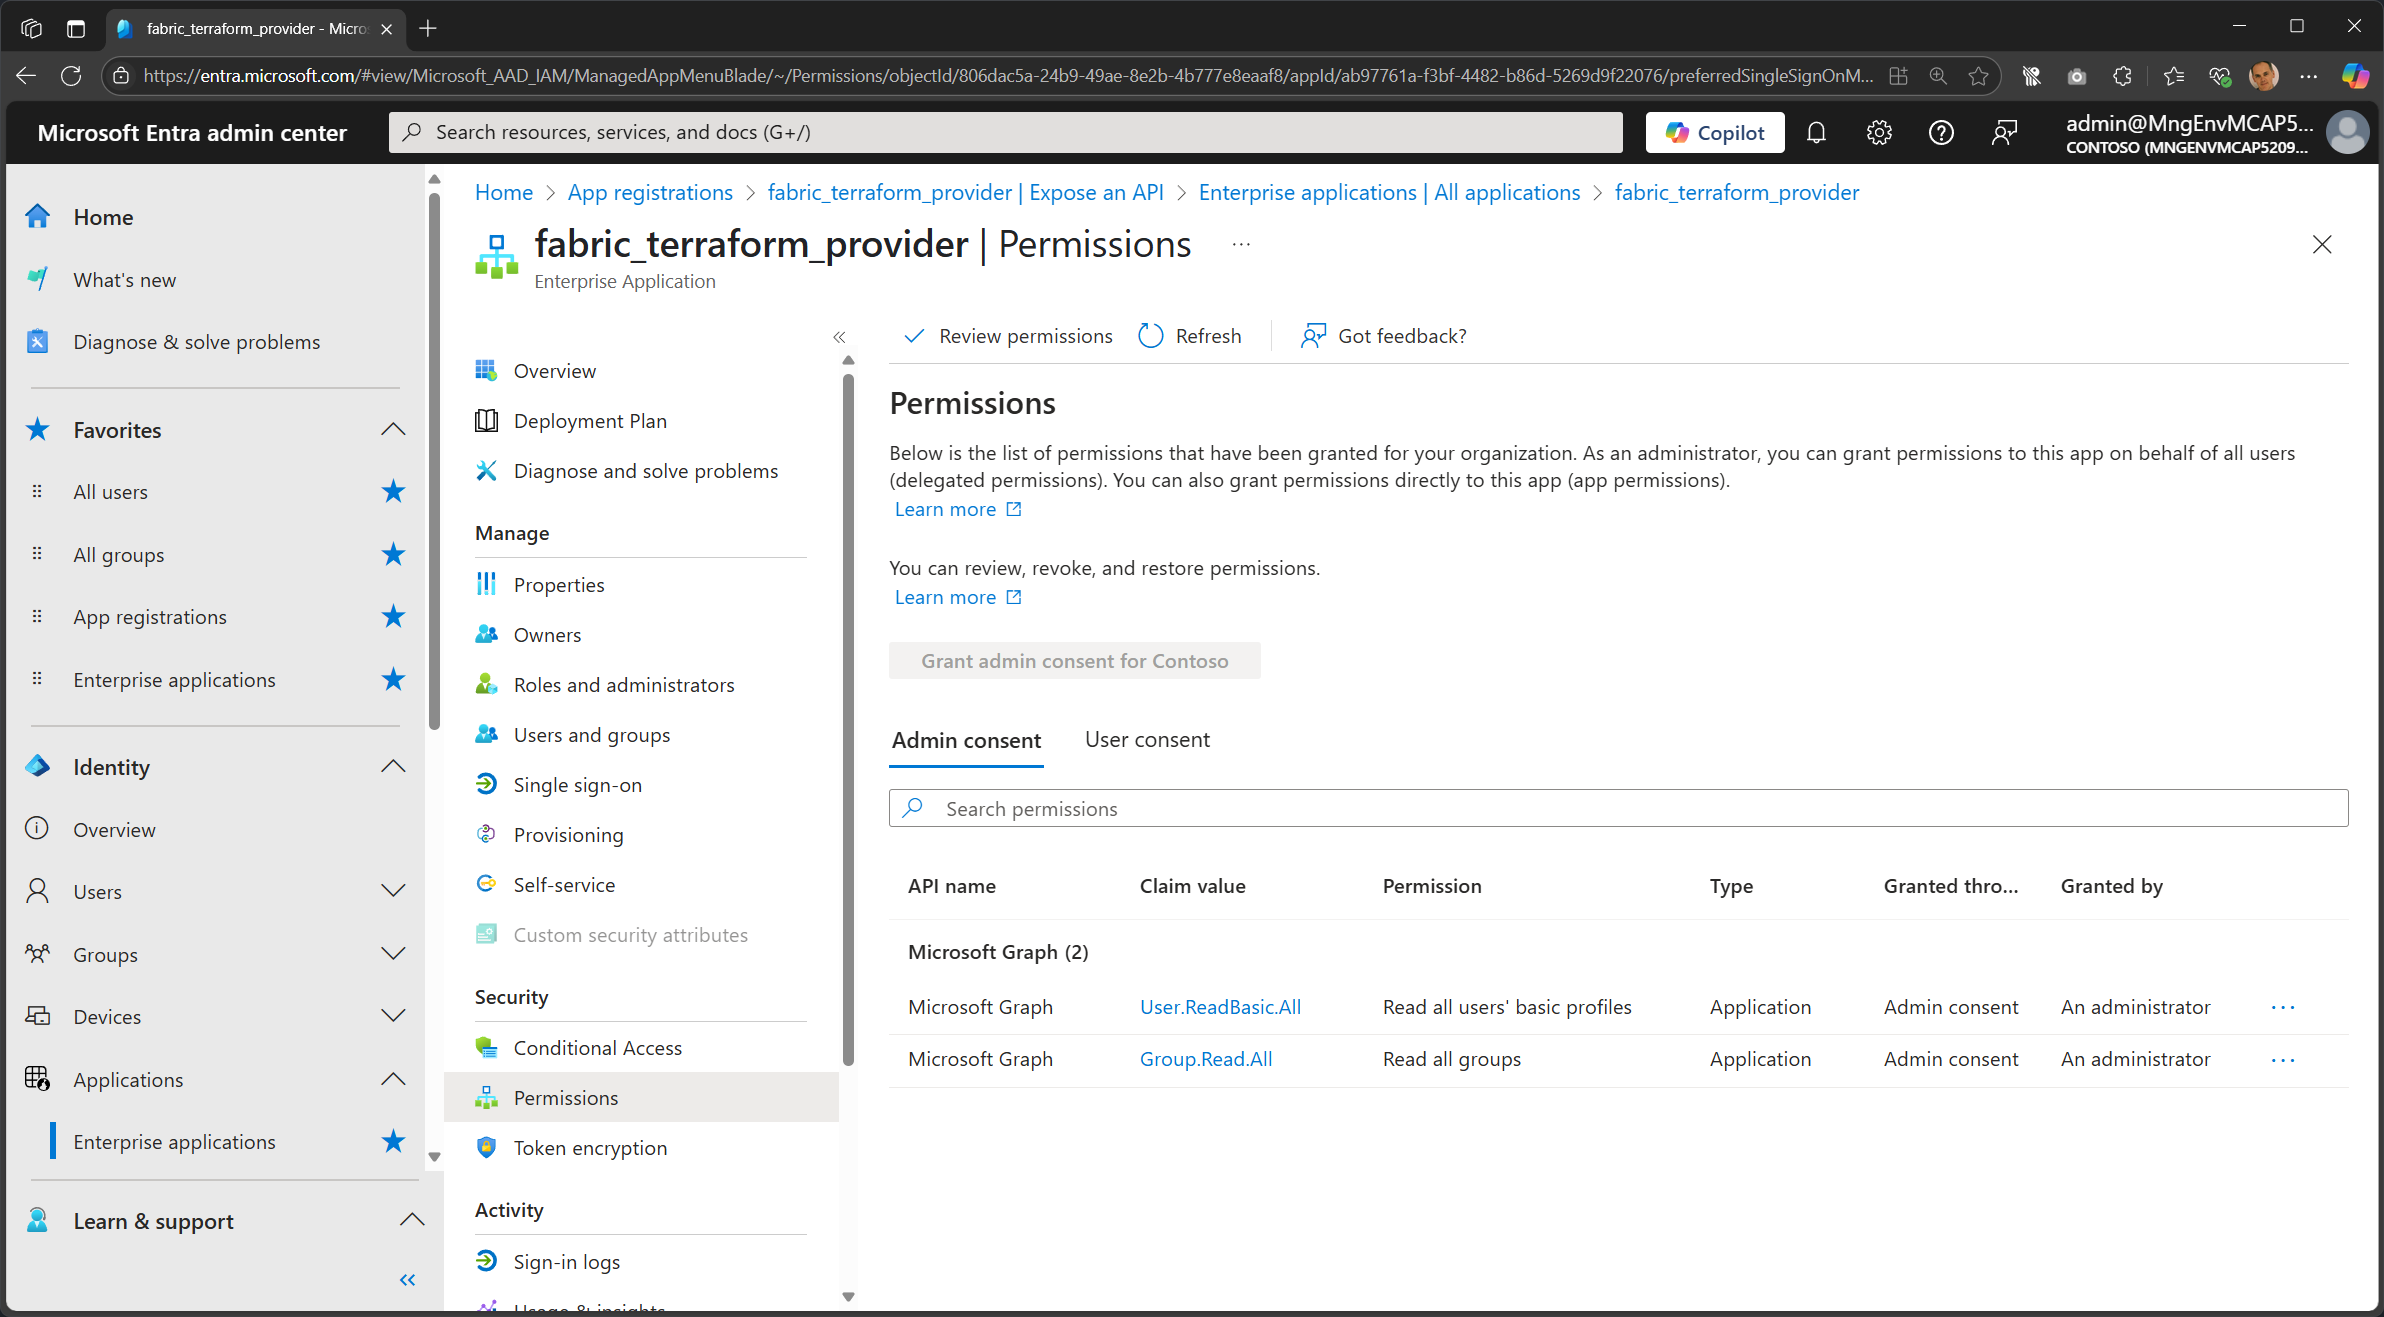
Viewing resulting app roles
Again the Azure CLI doesn’t yet support viewing app roles with either
az identityoraz ad sp, so this is another REST API call.az rest --method get --uri "$uri?\$expand=appRoleAssignments" --query appRoleAssignments --output jsoncOr go into the Entra admin portal
- switch the type to Managed identities
- filter Enterprise applications to “fabric”
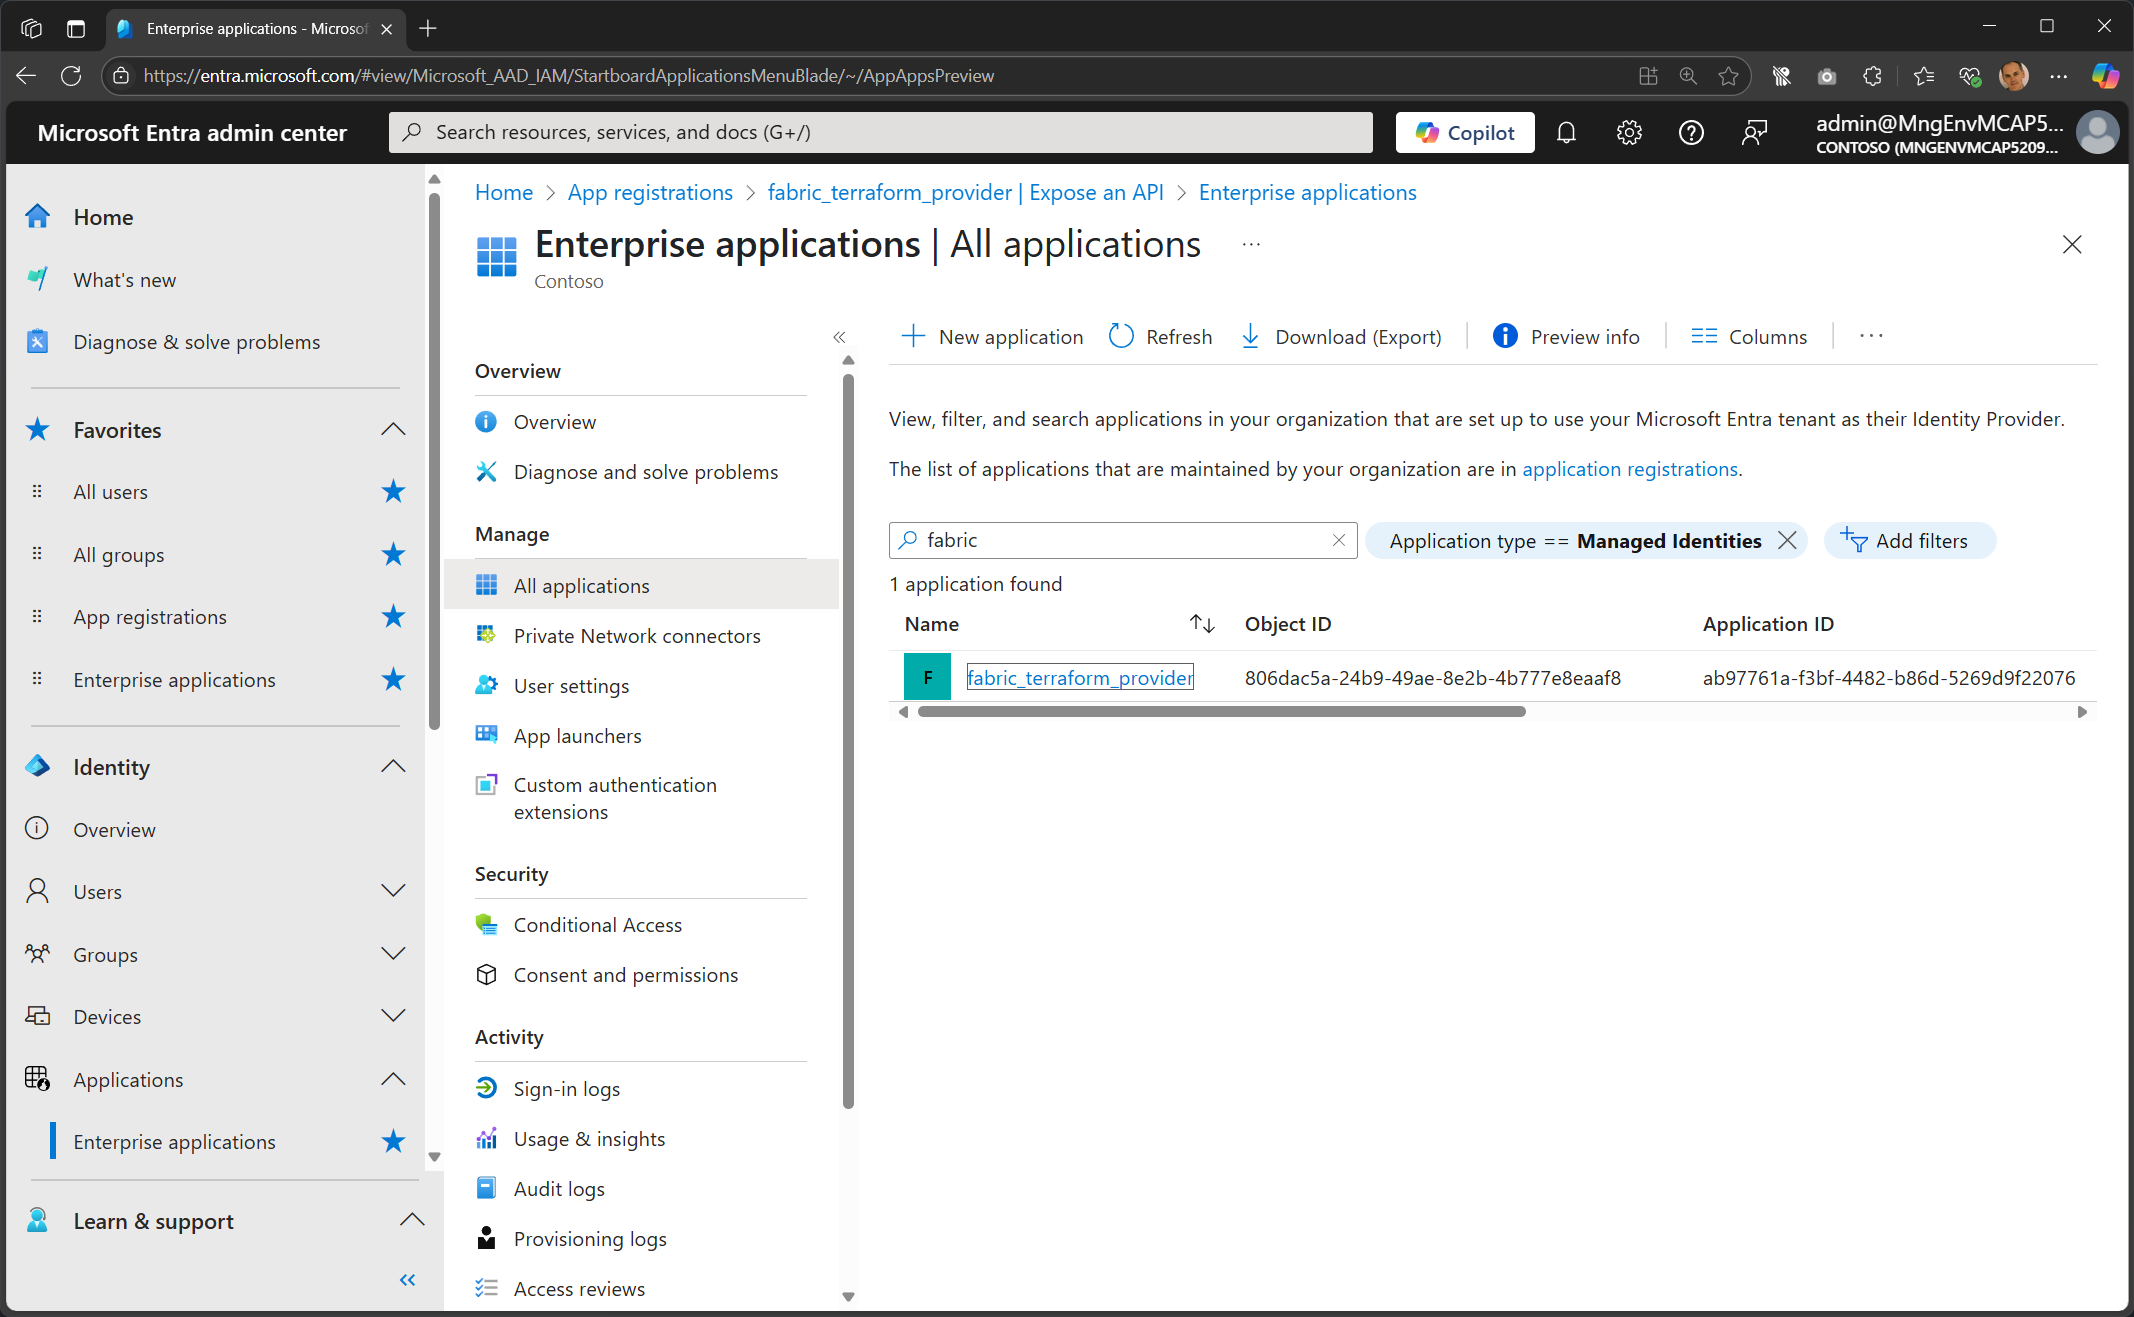
Click on Permissions.
Next
The managed identity is ready for use for the fabric terraform provider. Time to work with GitHub.