Using the Azure CLI
Use the CLI commands to create a vNet, a VM and then attach an NSG to a subnet.
Lab Overview
In this lab, we will learn how to use Azure CLI commands from the cloud shell to create a virtual network, create a virtual machine and attach a network security group to the new subnet. We will familiarize with Azure cloud shell and run CLI commands in Bash shell.
Lab Diagram
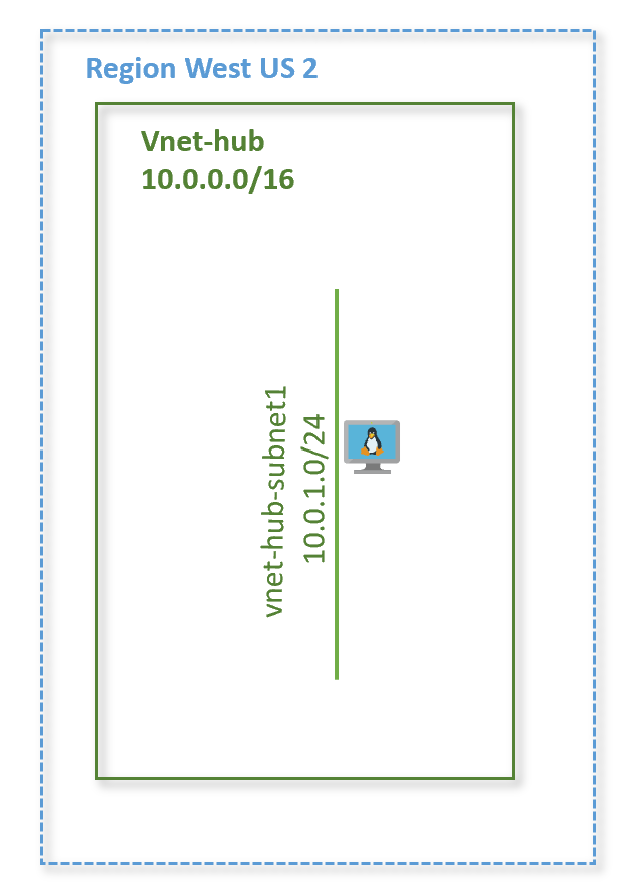
Start Cloud Shell
-
Launch Cloud Shell from the top navigation of the Azure portal

-
Select a subscription to create a storage account and Microsoft Azure Files share
-
Select “Create storage”
-
This should bring you to the cloud shell prompt. You can run Azure CLI commands from here.
Select Bash
Check that the environment drop-down from the left-hand side of shell window says Bash.
We are ready to run CLI commands to create our virtual network.
Create the virtual network
-
Define a group of variables:
ResourceGroup=rg-lab VnetName=vnet-hub VnetPrefix=10.0.0.0/16 SubnetName=vnet-hub-subnet1 SubnetPrefix=10.0.1.0/24 Location=westus2 -
Run the command to create a virtual network vnet-hub, with one subnet vnet-hub-subnet1.
az network vnet create -g $ResourceGroup -n $VnetName --address-prefix $VnetPrefix --subnet-name $SubnetName --subnet-prefix $SubnetPrefix -l $Location
Create the NSG and security rule
-
Define additional variables:
Nsg=nsg-hub NsgRuleName=vnet-hub-allow-ssh DestinationAddressPrefix=10.0.1.0/24 DestinationPortRange=22 -
Create the Network Security Group and add the security rule
az network nsg create --name $Nsg --resource-group $ResourceGroup --location $Location
az network nsg rule create -g $ResourceGroup --nsg-name $Nsg --name $NsgRuleName --direction inbound --destination-address-prefix $DestinationAddressPrefix --destination-port-range $DestinationPortRange --access allow --priority 100
Attach the NSG to the subnet
-
Attach the network security group to vnet-hub-subnet1
az network vnet subnet update -g $ResourceGroup -n $SubnetName --vnet-name $VnetName --network-security-group $Nsg
Create a VM
-
Declare additional variables
VmName=vnet-hub-vm1 AdminUser=azureuser AdminPassword=Azure123456! -
Create the virtual machine
az vm create --resource-group $ResourceGroup --name $VmName --image UbuntuLTS --vnet-name $VnetName --subnet $SubnetName  --admin-username $AdminUser --admin-password $AdminPassword
az network vnet subnet list -g $ResourceGroup --vnet-name $VnetName -o table